Introduction to LayOut

LayOut is a page-creation program that has 3D presentation capabilities coupled with two-dimensional 2D drafting tools. In LayOut, you arrange 3D perspective views and scaled 2D orthographic views on a sheet of paper to graphically explain a design. Then use LayOut's sleek drawing toolset to add informative annotations on top of those views to provide an additional layer of information.
Dynamic Link
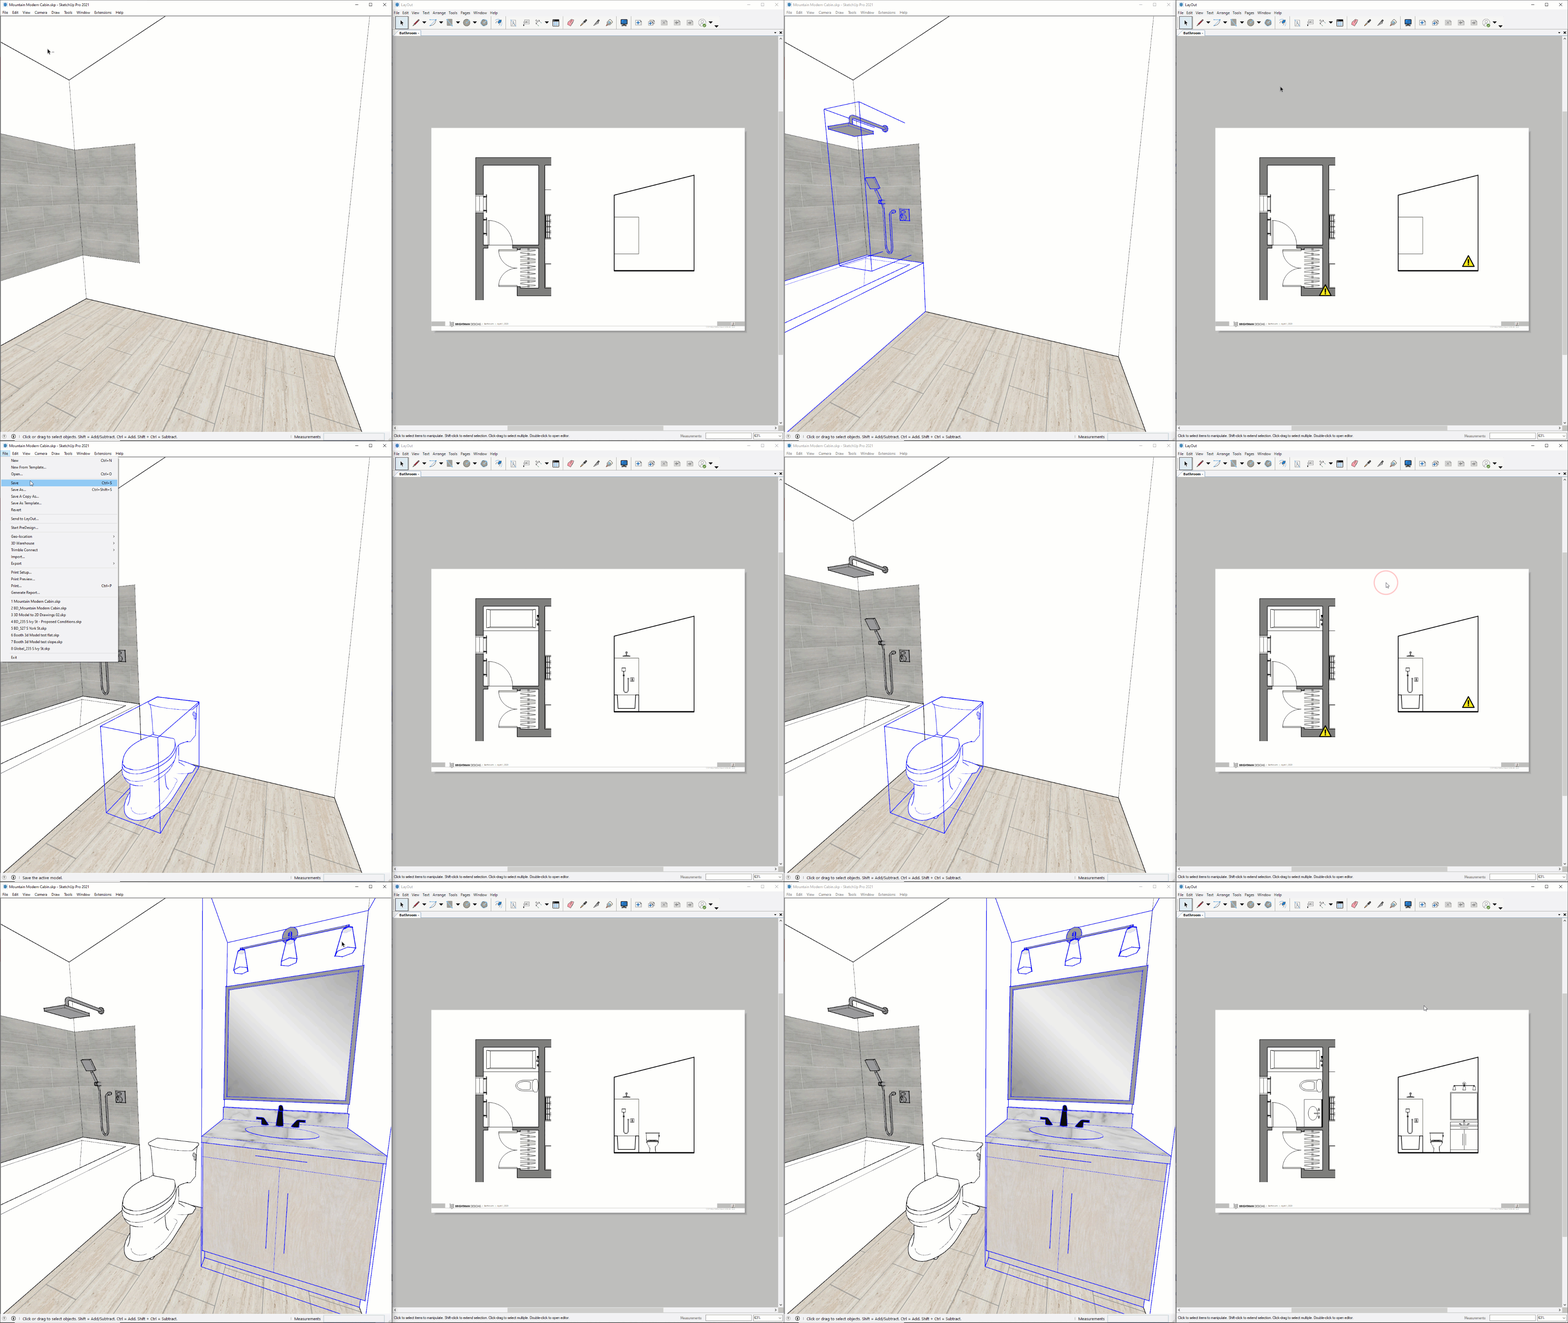
The 3D SketchUp model space and the 2D LayOut paper space are connected. The dynamic link between them is critical to the efficiency of the SketchUp Workflow. After you modify and save the SketchUp model, LayOut will let you know that the link needs to be updated. When you update or refresh the model within LayOut, all the linked 2D drawings in your presentation will reflect the most current design. This dynamic link eliminates the need to re-export every time you make a presentation, gives you the freedom to make last-minute design changes in 3D and then simply update your presentation before a meeting. When a SketchUp model is dynamically linked to a LayOut presentation, all drawings are derived from one model and updated simultaneously.
Model Space
SketchUp is equivalent to CAD's model space. SketchUp is where your design comes to life. Everything built in SketchUp 3D is drawn at a 1:1 real-world scale. This means that if a wall is to be built 10 feet tall in the real world, you draw the wall 10 feet tall in your SketchUp model. You don't need to crunch the numbers into an architectural scale while working in model space. Everything in SketchUp is built to the size it is intended to be built to in the real world
Paper Space
LayOut is SketchUp's equivalent to CAD's paper space. LayOut's is where your drawings comes to life. Place the viewports, or windows looking into your SketchUp model, on a standard sheets with title blocks. Arrange the viewports on the sheet and set the orthographic views to architectural scales. Layer on annotations, dimensions, callouts, and symbols. Finally, export the drawing set to a PDF to share with clients and consultants.
Welcome to LayOut
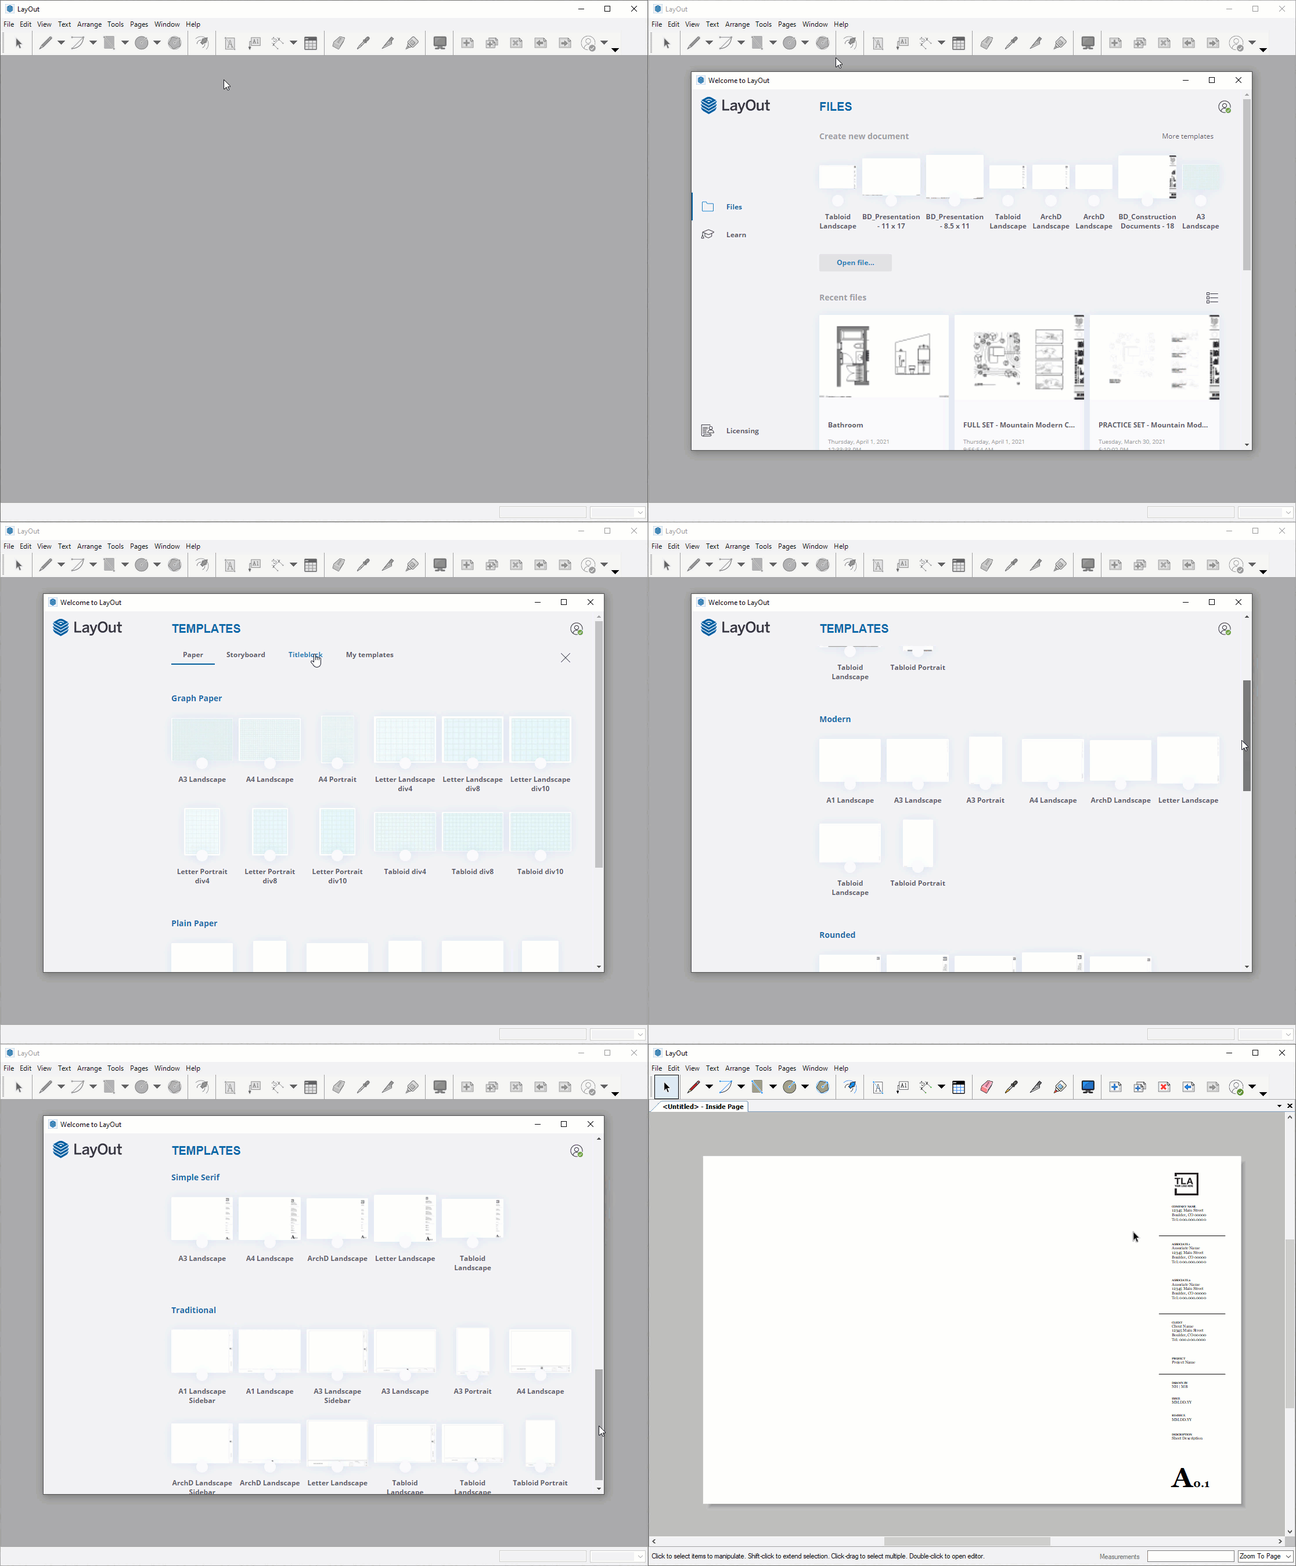
When you first open LayOut, you are greeted with the "Welcome to LayOut" window. This window provides access to recent files and learning links, but it's primary use is to select a title block. Follow these steps...
- If you don't see the "Welcome to LayOut" window, you can access it by clicking the Help dropdown > Welcome to LayOut
- Click "More Templates" to access the full library
- Click on "Titleblock" to narrow your search.
Dig Deeper... The default templates provided by LayOut are pretty weak. Chapter 00 of "The SketchUp Workflow for Architecture" walks you through building a professional title block. Also, the ConDoc Tools extension includes the same title blocks already created and formatted to several standard sizes.
Navigation
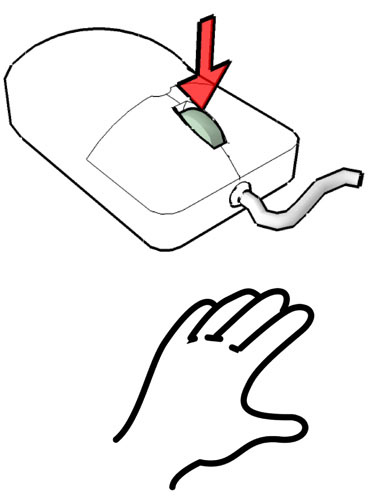
Similar to SketchUp, navigating in LayOut is best accomplished with a 3-button scroll wheel mouse. Keep these tips in mind when navigating LayOut...
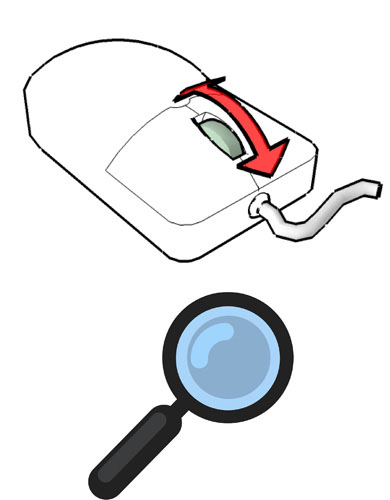
- Roll the scrollwheel towards the screen to zoom in, away from the screen to zoom out.
- Push down on the scroll wheel button and move your cursor to pan
- Click the View dropdown for additional navigation options
- Click the zoom percentage dropdown at the bottom of the screen to select a zoom option. It is helpful to check your presentation at 100%.
- Just like SketchUp, your cursor is the focus of all navigation in LayOut. Be sure to hover on the object of interest before performing the navigation.
Select Tool

The Select tool is the most common tool you will use in LayOut. It allows you to move, rotate, copy, array, enter groups, and view and entity's properties. Keep these tips in mind...
- Click on any LayOut entity to select it. Once selected, the entity's properties will be displayed in the relevant inspectors.
- Once an entity is selected, hover on the geometry, then click and drag to move.
- While moving an entity, hold Ctrl (Option on Mac) to leave a copy behind.
Link a Model
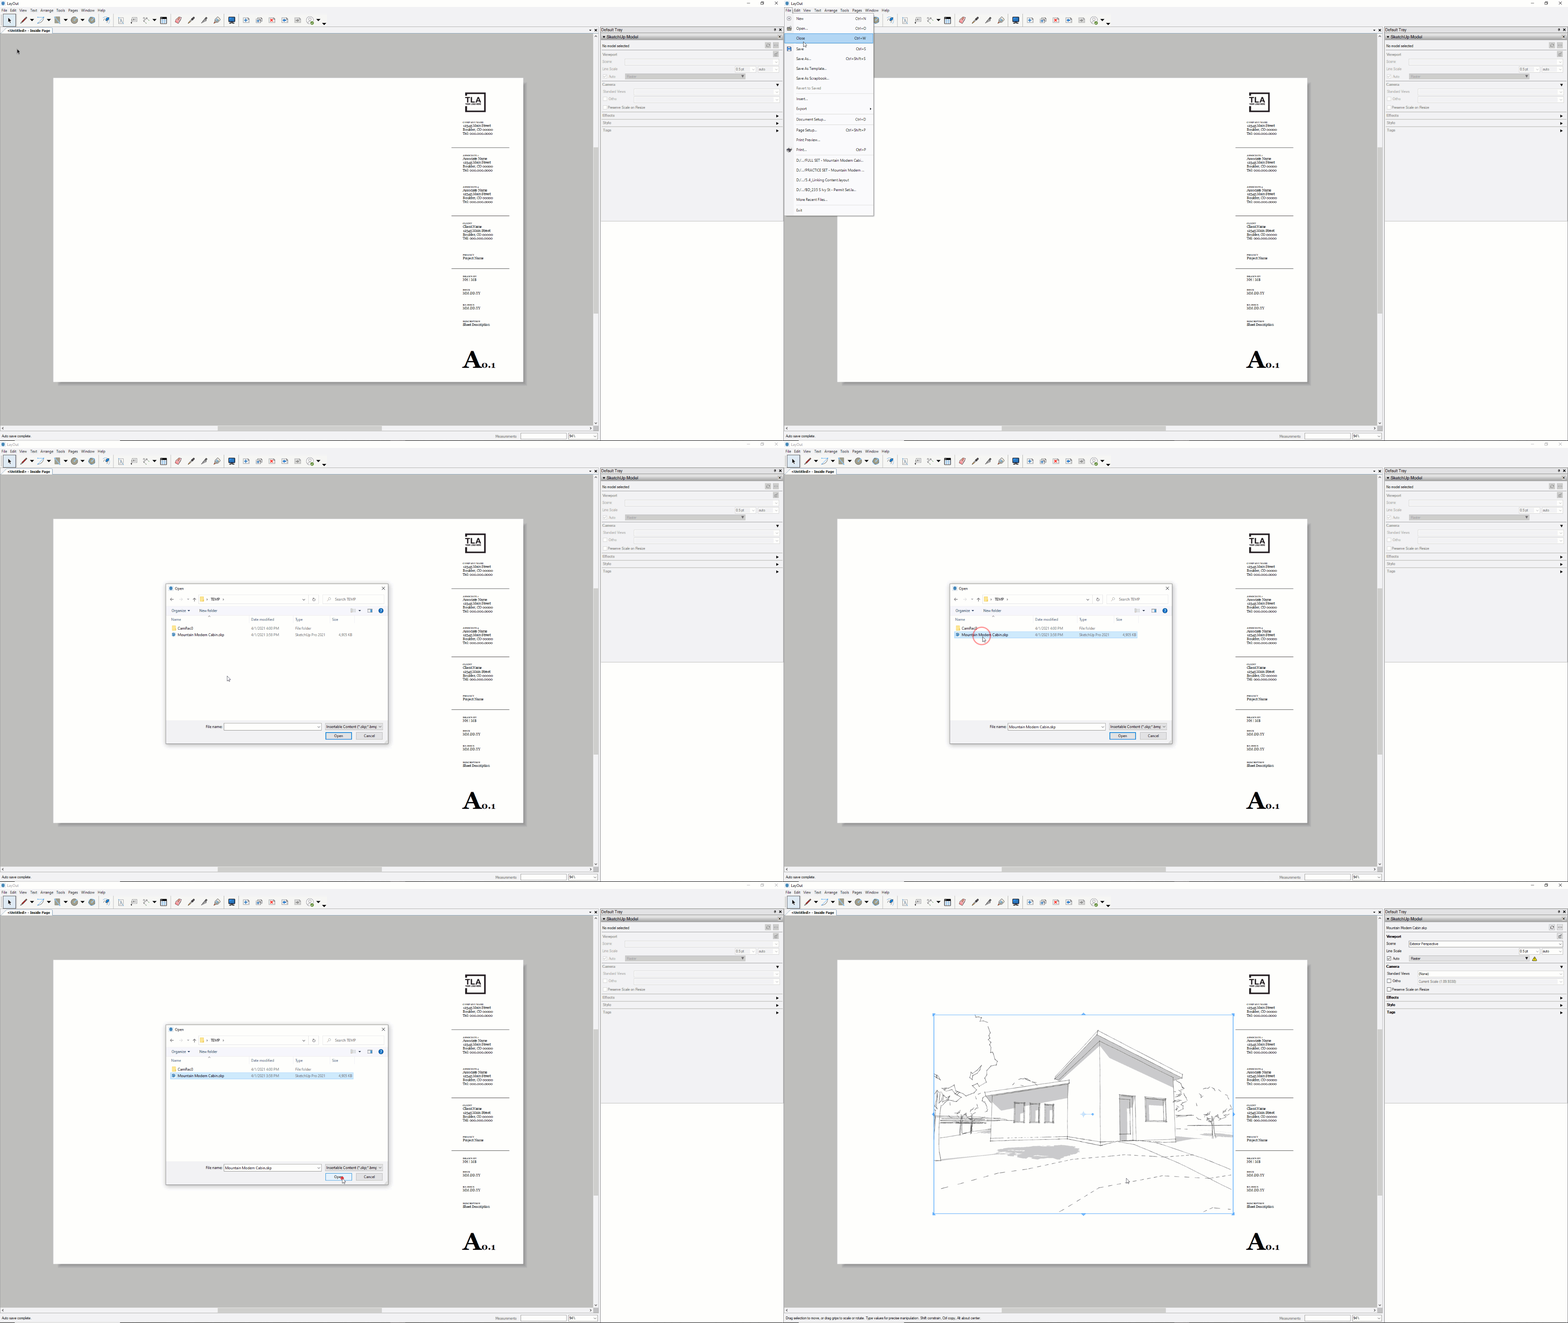
Your SketchUp model can be inserted into LayOut as a reference. Once inserted, the SketchUp model is displayed in a viewport. Moving forward, changes made to the SketchUp model will be reflected in the LayOut viewports. Follow these steps...
- Click the File dropdown > Insert...
- Navigate to the folder containing your SketchUp model and select it
- Click "Open"
Link your 3D SketchUp model to 2D LayOut...
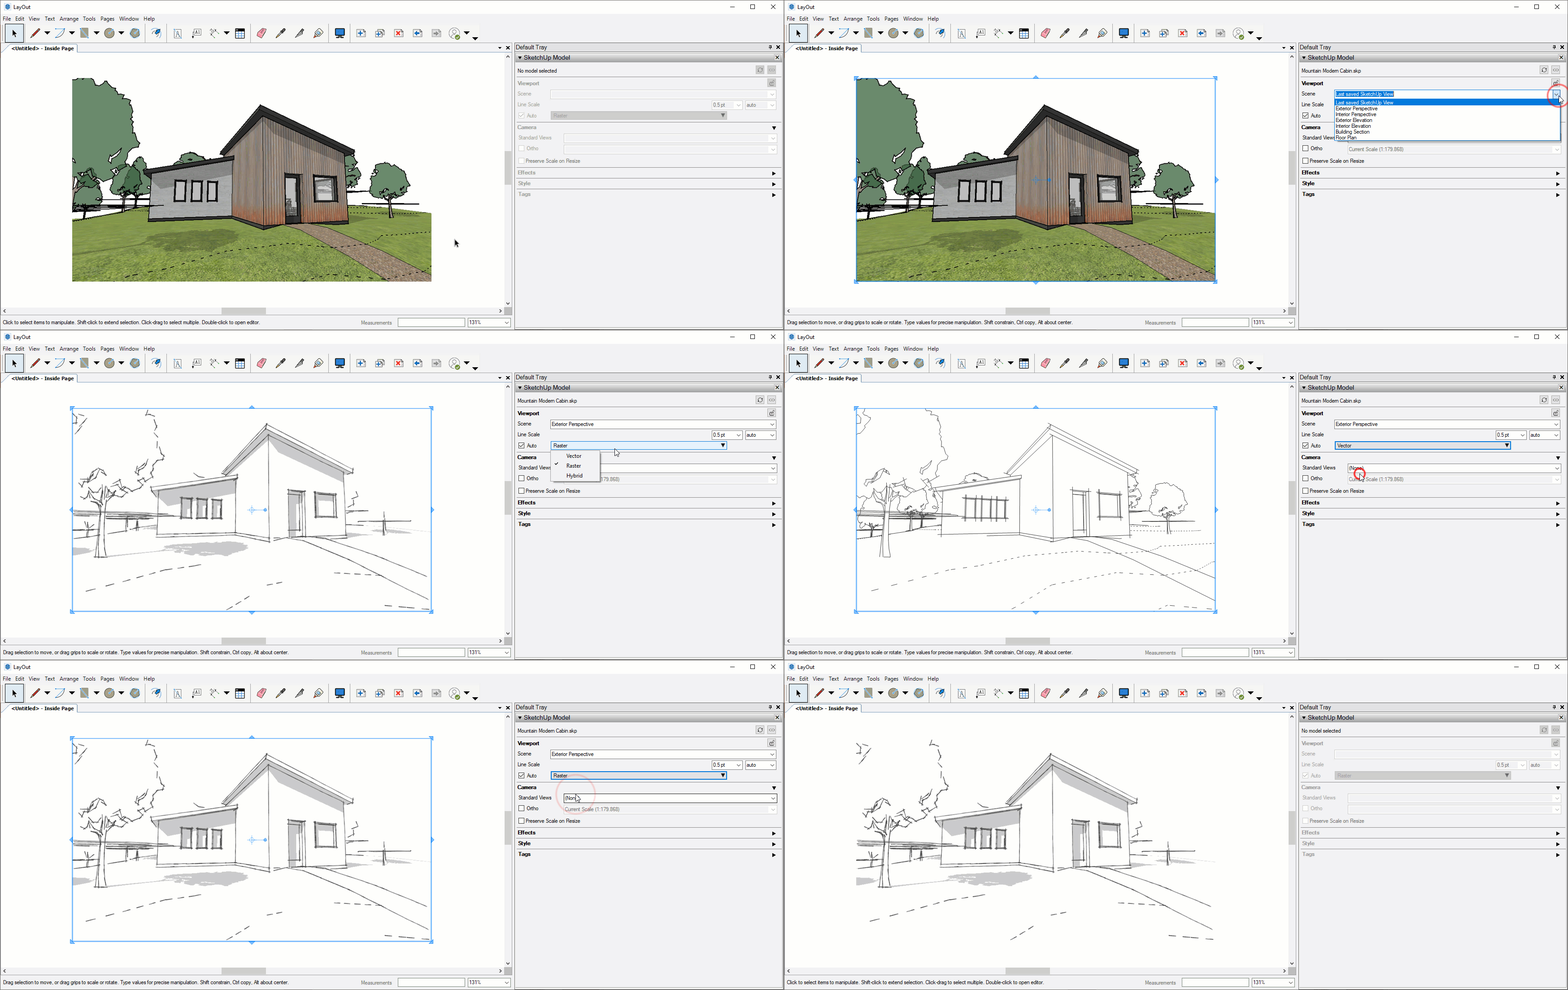
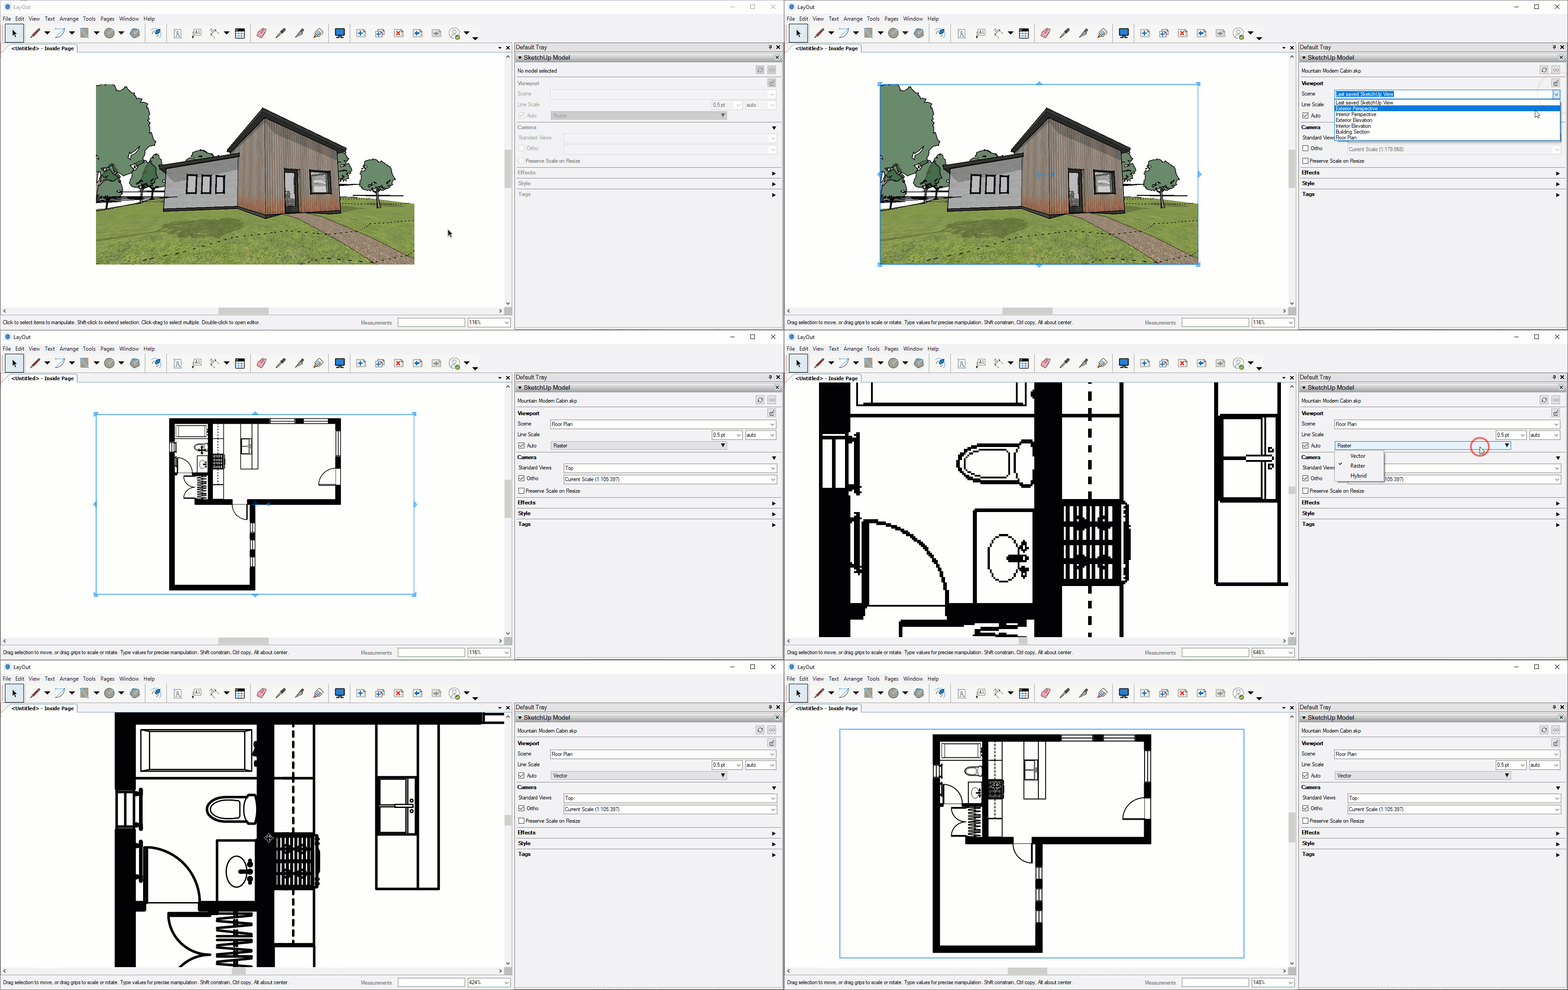
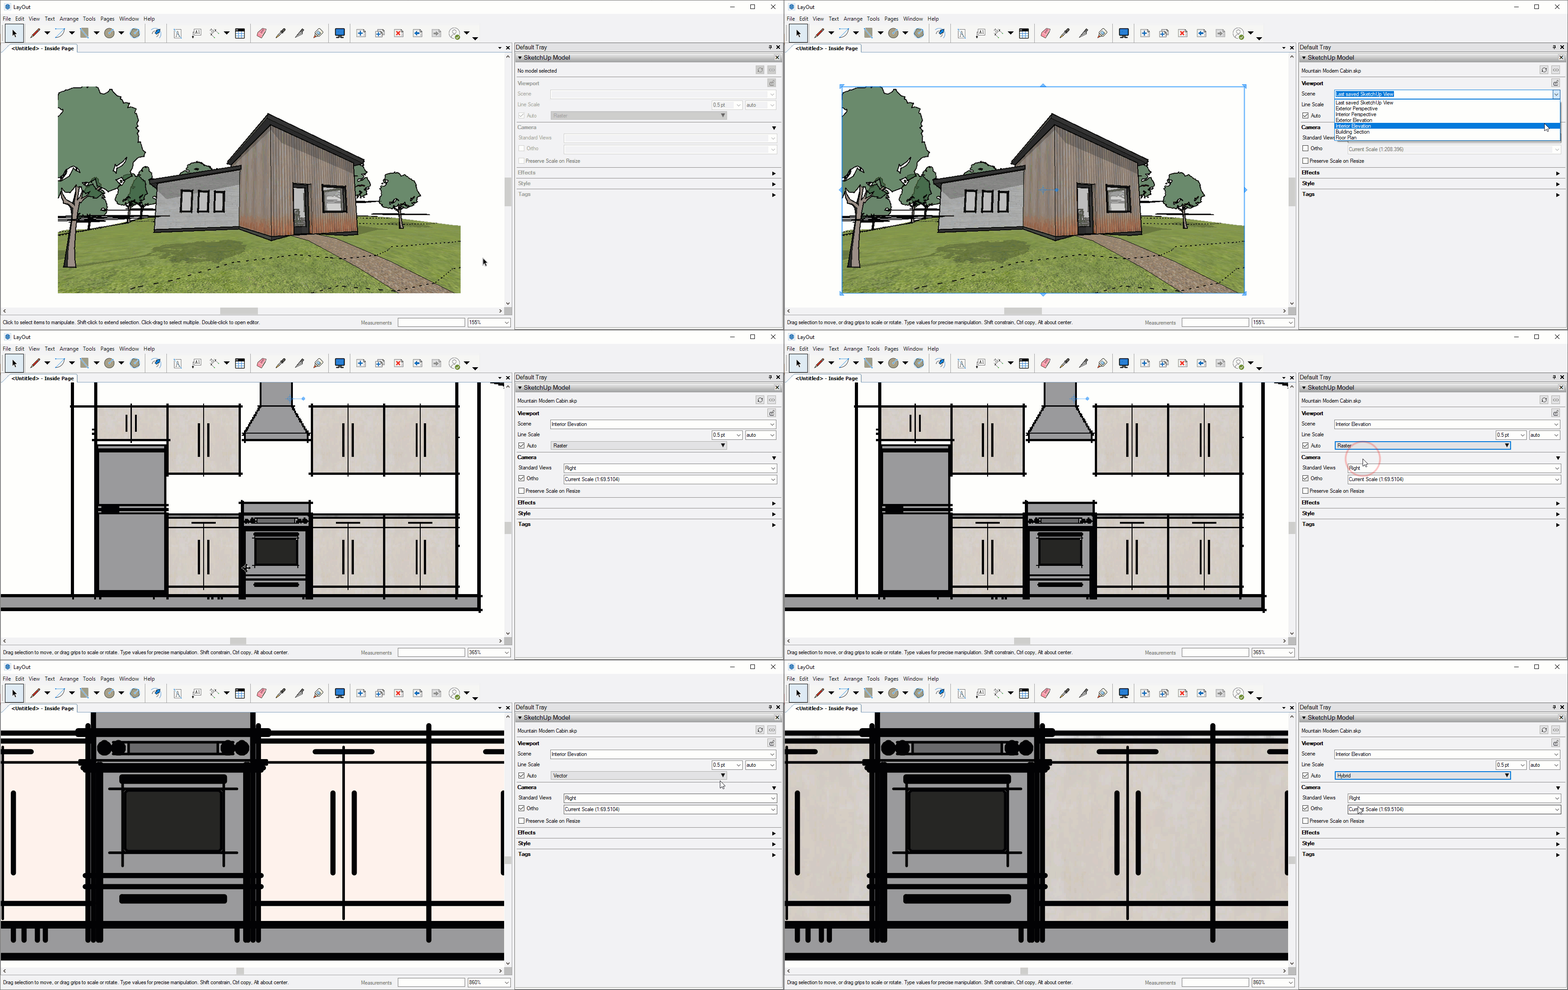
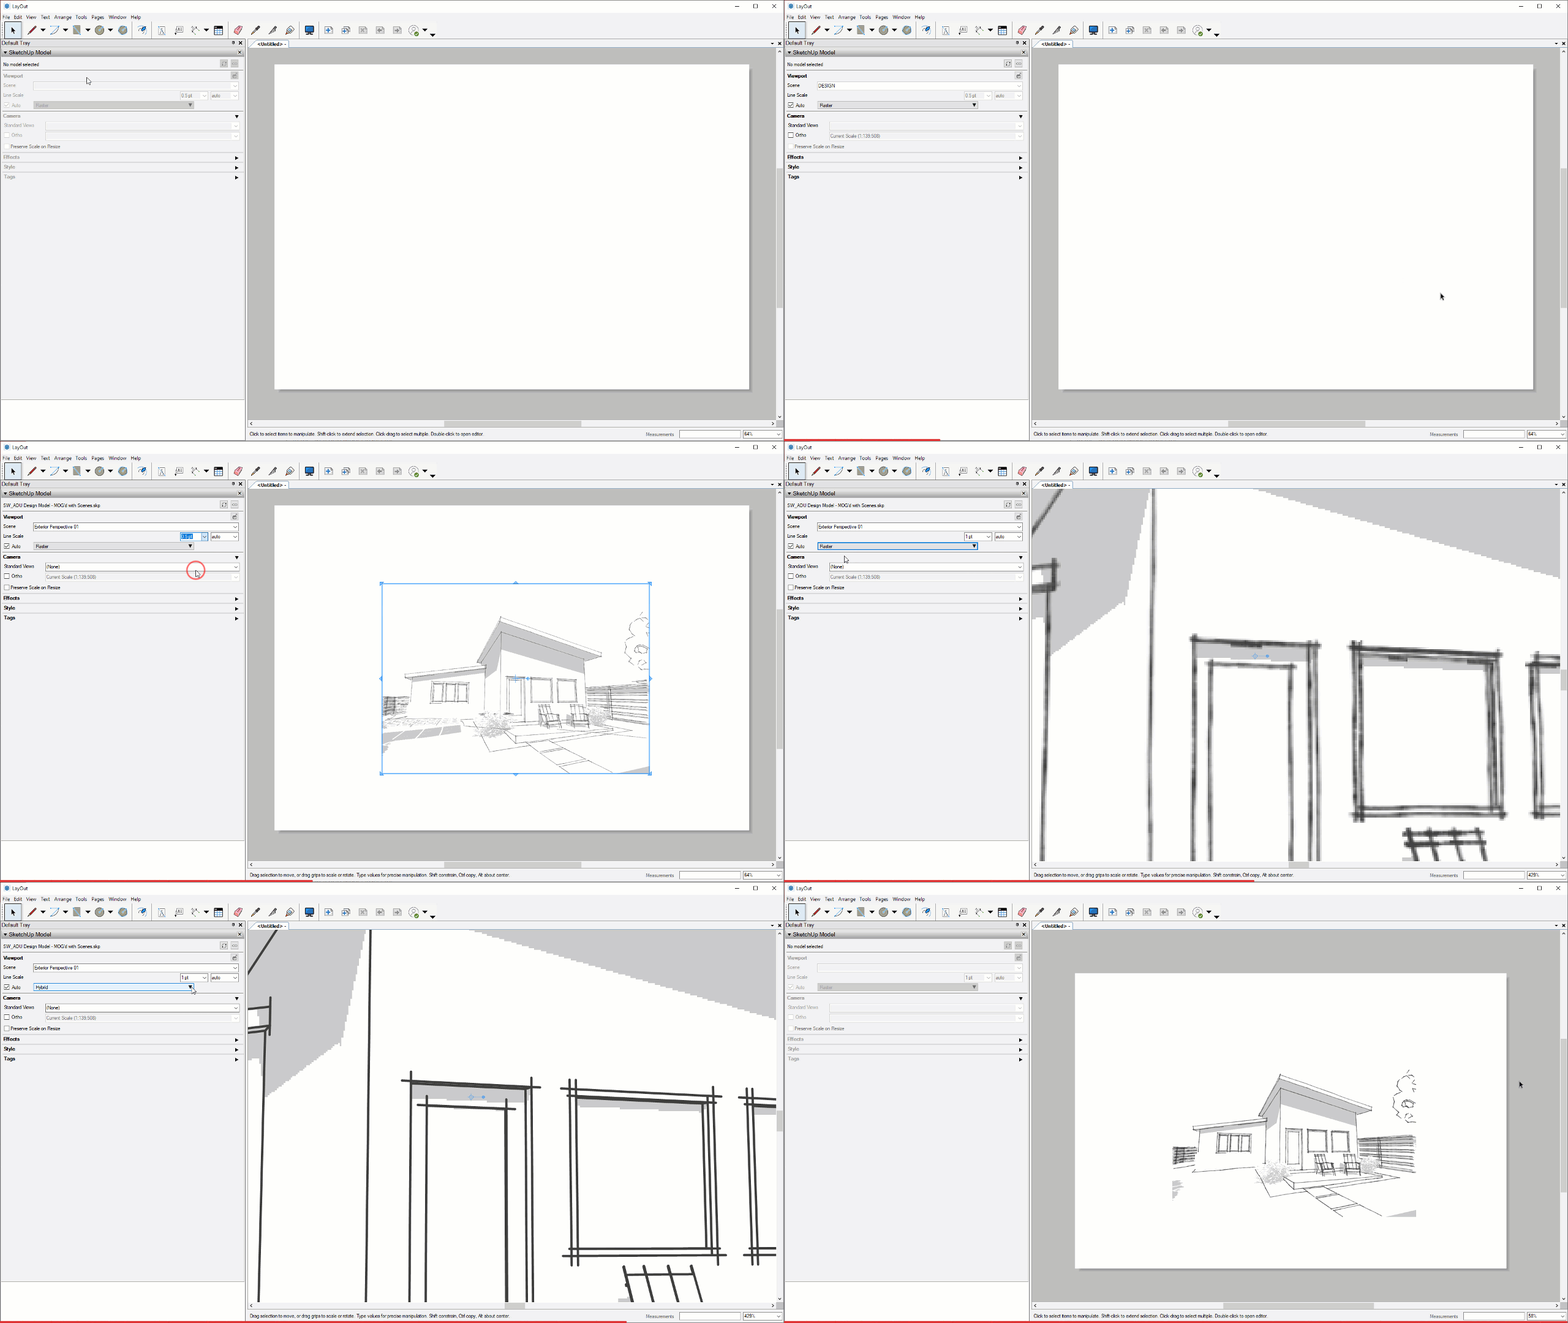
Once your SketchUp model is inserted, it appears as a viewport that is already selected. While selected, the settings of the viewport can be adjusted in the SketchUp Model inspector. Start by choosing a scene that you created in SketchUp, then an appropriate rendering setting.
Heads Up! An architectural scale can only be applied to "Ortho" views. This is also called "Parallel Projection" in SketchUp.
Render Settings
DIG DEEPER... Check out page 389 of "The SketchUp Workflow for Architecture" for more information on rendering settings.
Line Weights
Lorem Ipsum is simply dummy text of the printing and typesetting industry. Lorem Ipsum has been the industry's standard dummy text ever since the 1500s, when an unknown printer took a galley of type and scrambled it to make a type specimen book. It has survived not only five centuries, but also the leap into electronic typesetting, remaining essentially unchanged. It was popularised in the 1960s with the release of Letraset sheets containing Lorem Ipsum passages, and more recently with desktop publishing software like Aldus PageMaker including versions of Lorem Ipsum.
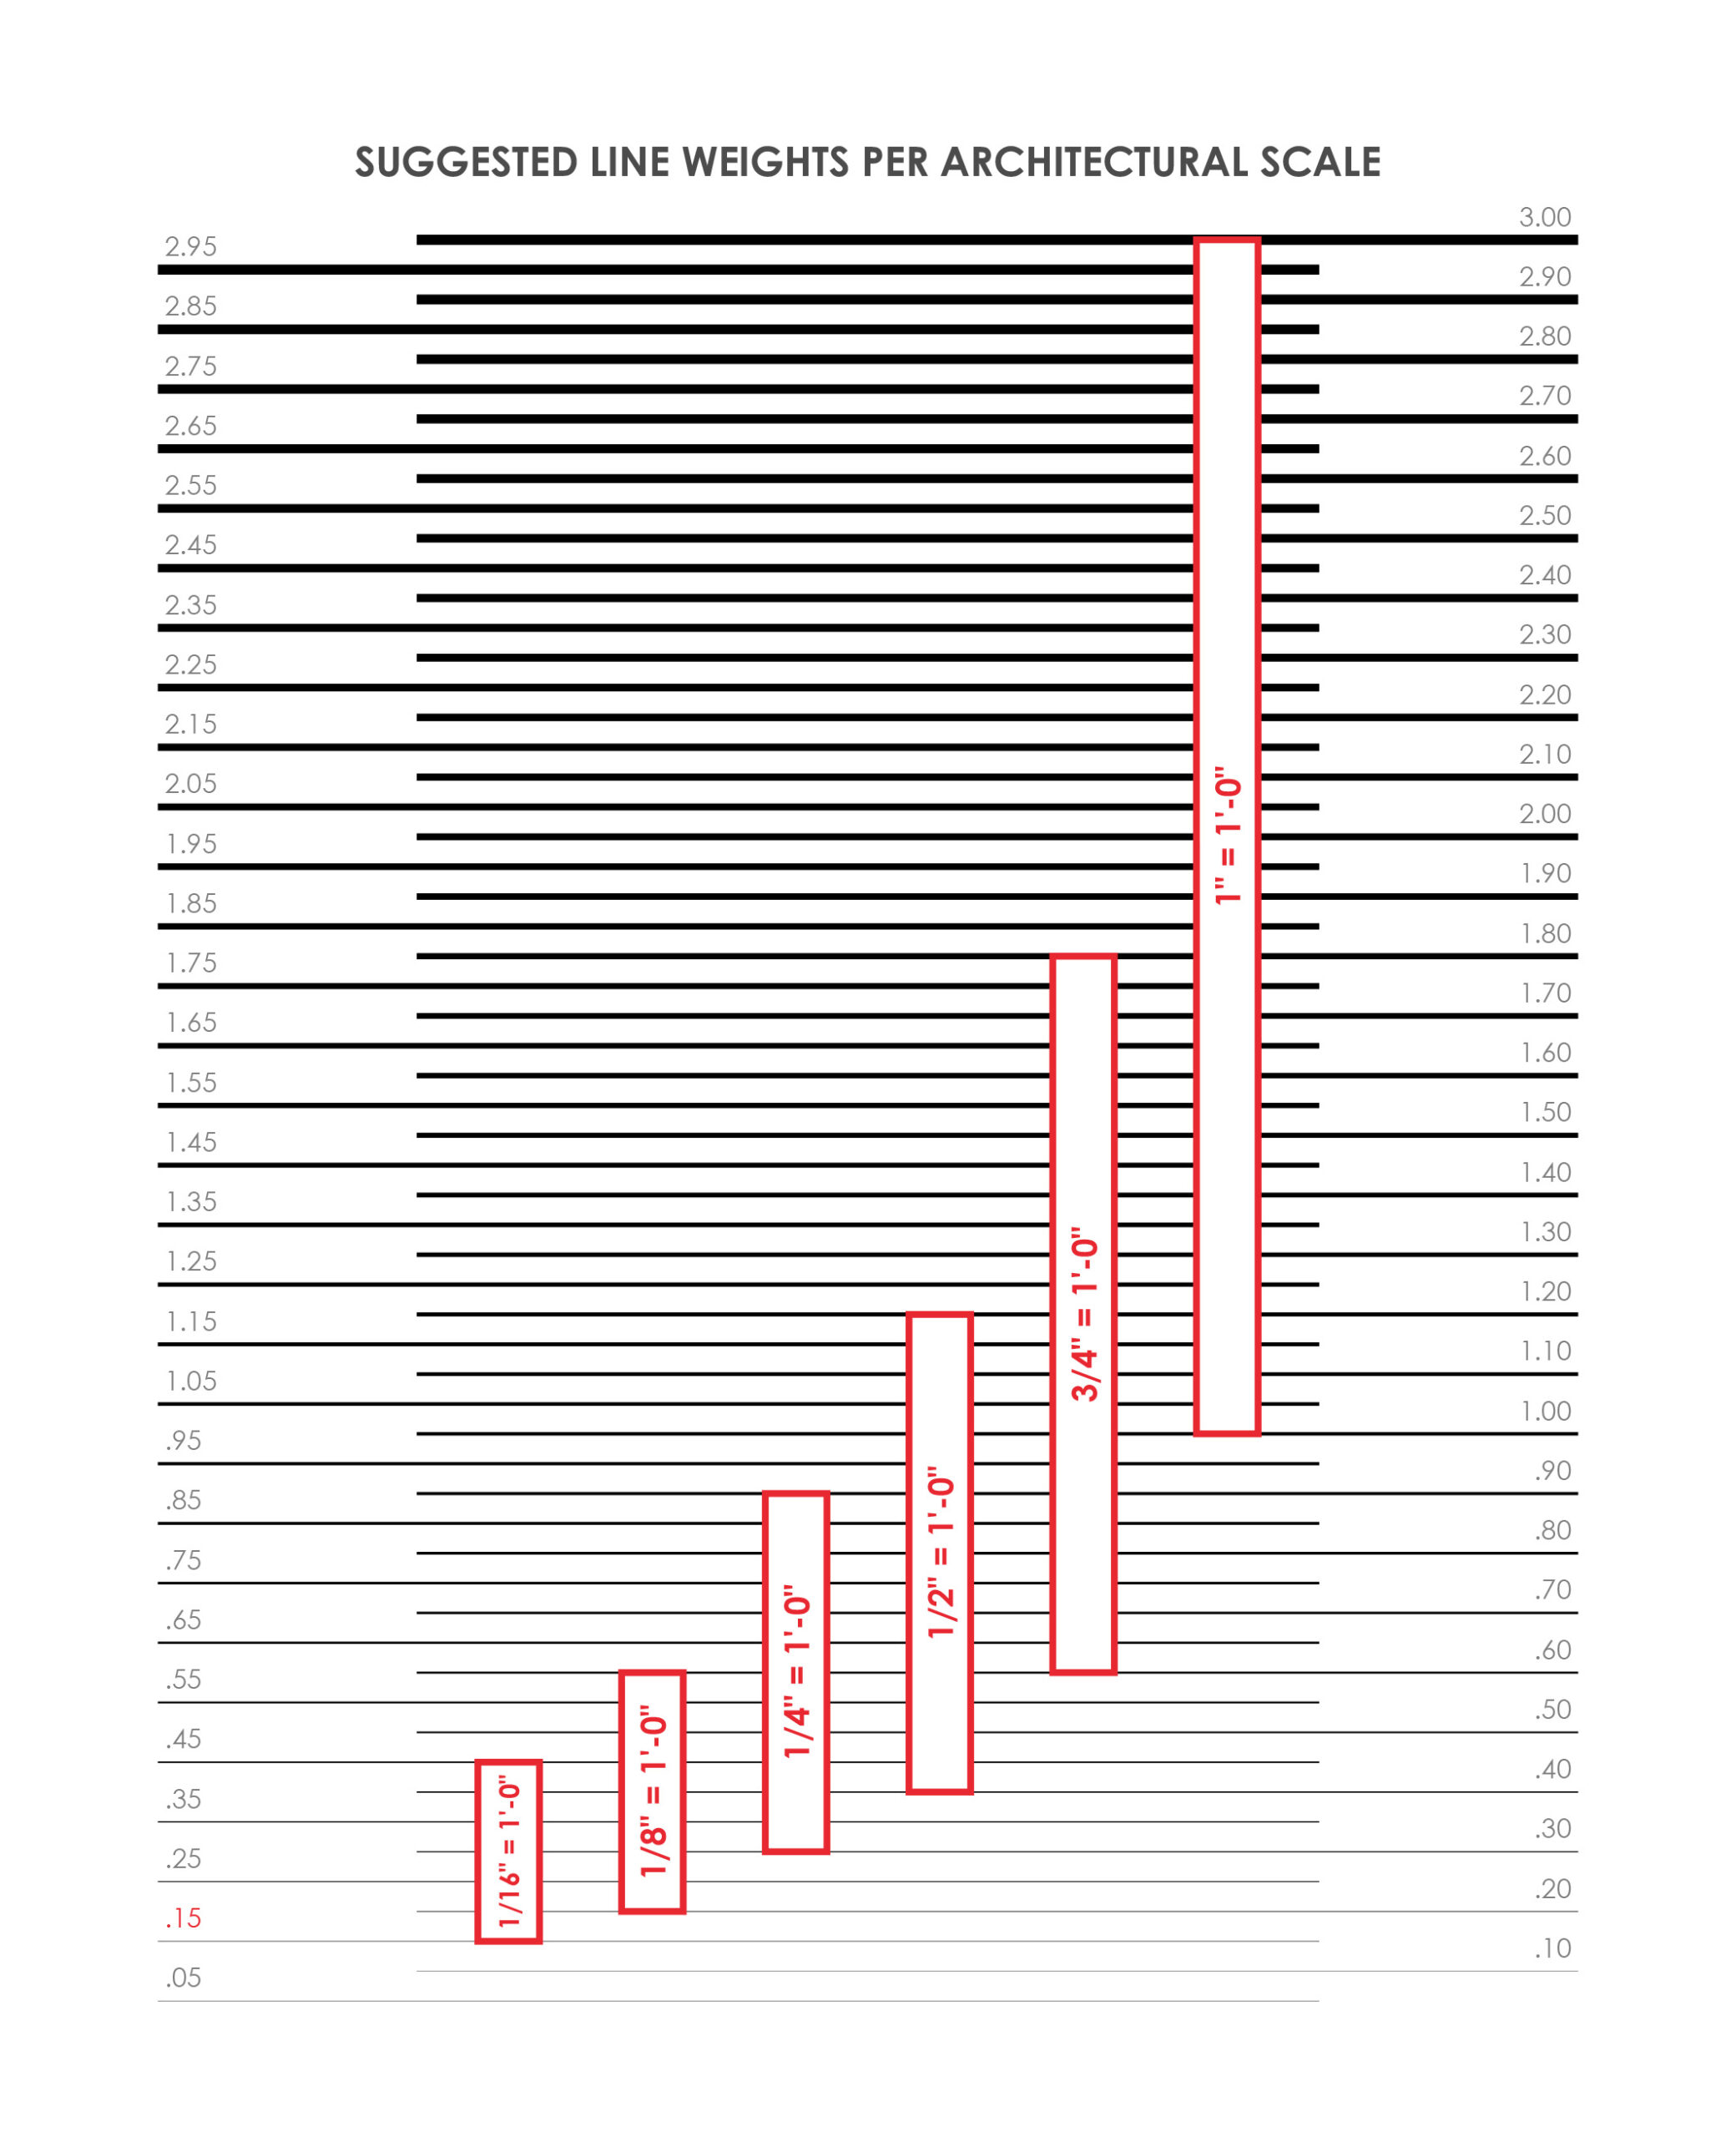
Find the right line weight for your drawings based on the architectural scale...
5 Step Recipe for Any Drawing Viewport
Here's a predictable formula and some tips for creating any drawing viewport, follow these steps...
Drawings
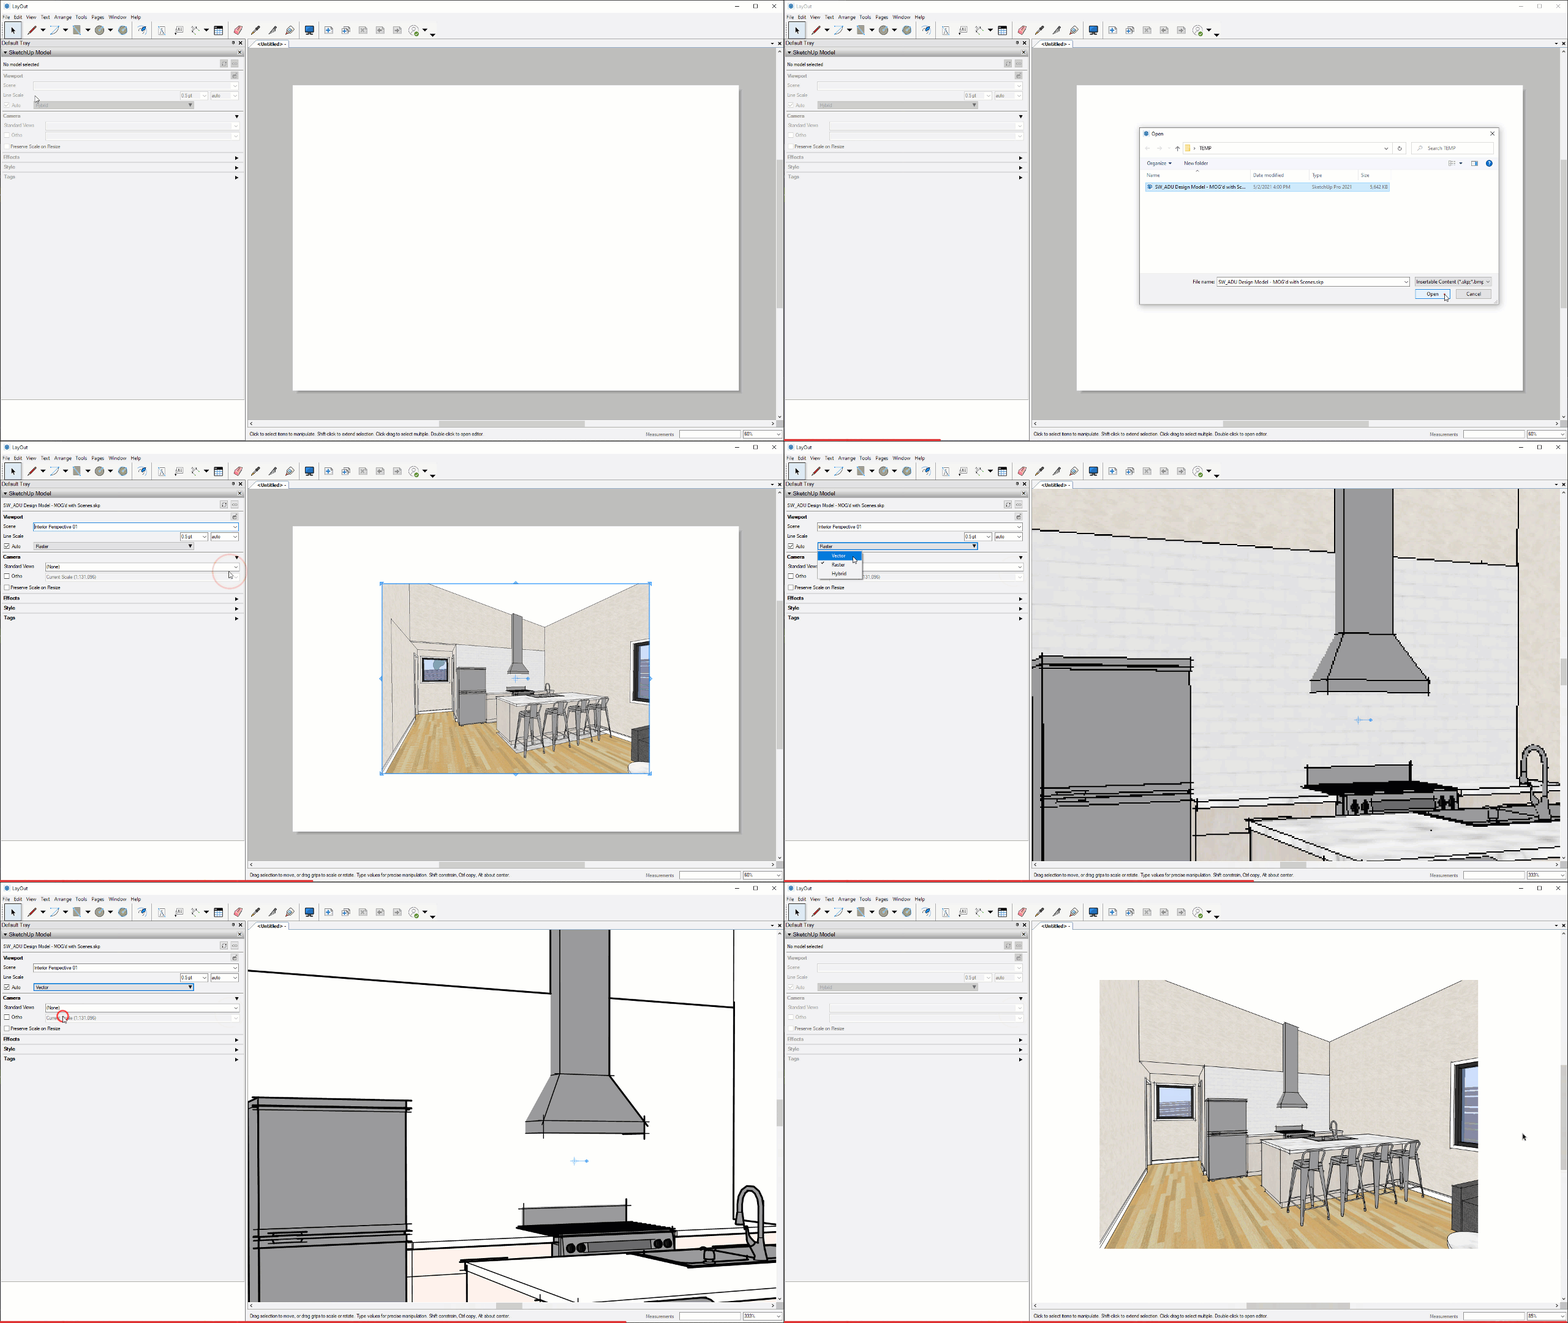
Create a drawing with each of the drawing scenes we created in the last lesson.
Exterior Perspective Drawing
1. Click the File dropdown > Insert...
2. Find the folder containing your SketchUp model and select it, click "Open"
3. In the SketchUp Model inspector,
- Scene: "Exterior Perspective"
- Line scale: 1
- Render Setting: Raster
- Architectural Scale: N/A
4. Render the viewports, or check Auto on.
Interior Perspective Drawing
1. Click the File dropdown > Insert...
2. Find the folder containing your SketchUp model and select it, click "Open"
3. In the SketchUp Model inspector,
- Scene: "Interior Perspective"
- Line scale: .5
- Render Setting: Hybrid
- Architectural Scale: N/A
4. Render the viewports, or check Auto on.
Exerior Elevation Drawing
1. Click the File dropdown > Insert...
2. Find the folder containing your SketchUp model and select it, click "Open"
3. In the SketchUp Model inspector,
- Scene: "Exterior Elevation"
- Line scale: .3
- Render Setting: Hybrid
- Architectural Scale: 1/4" = 1'-0"
4. Render the viewports, or check Auto on.
Interior Elevation Drawing
1. Click the File dropdown > Insert...
2. Find the folder containing your SketchUp model and select it, click "Open"
3. In the SketchUp Model inspector,
- Scene: "Interior Elevation"
- Line scale: .4
- Render Setting: Hybrid
- Architectural Scale: 1/2" = 1'-0"
4. Render the viewports, or check Auto on.
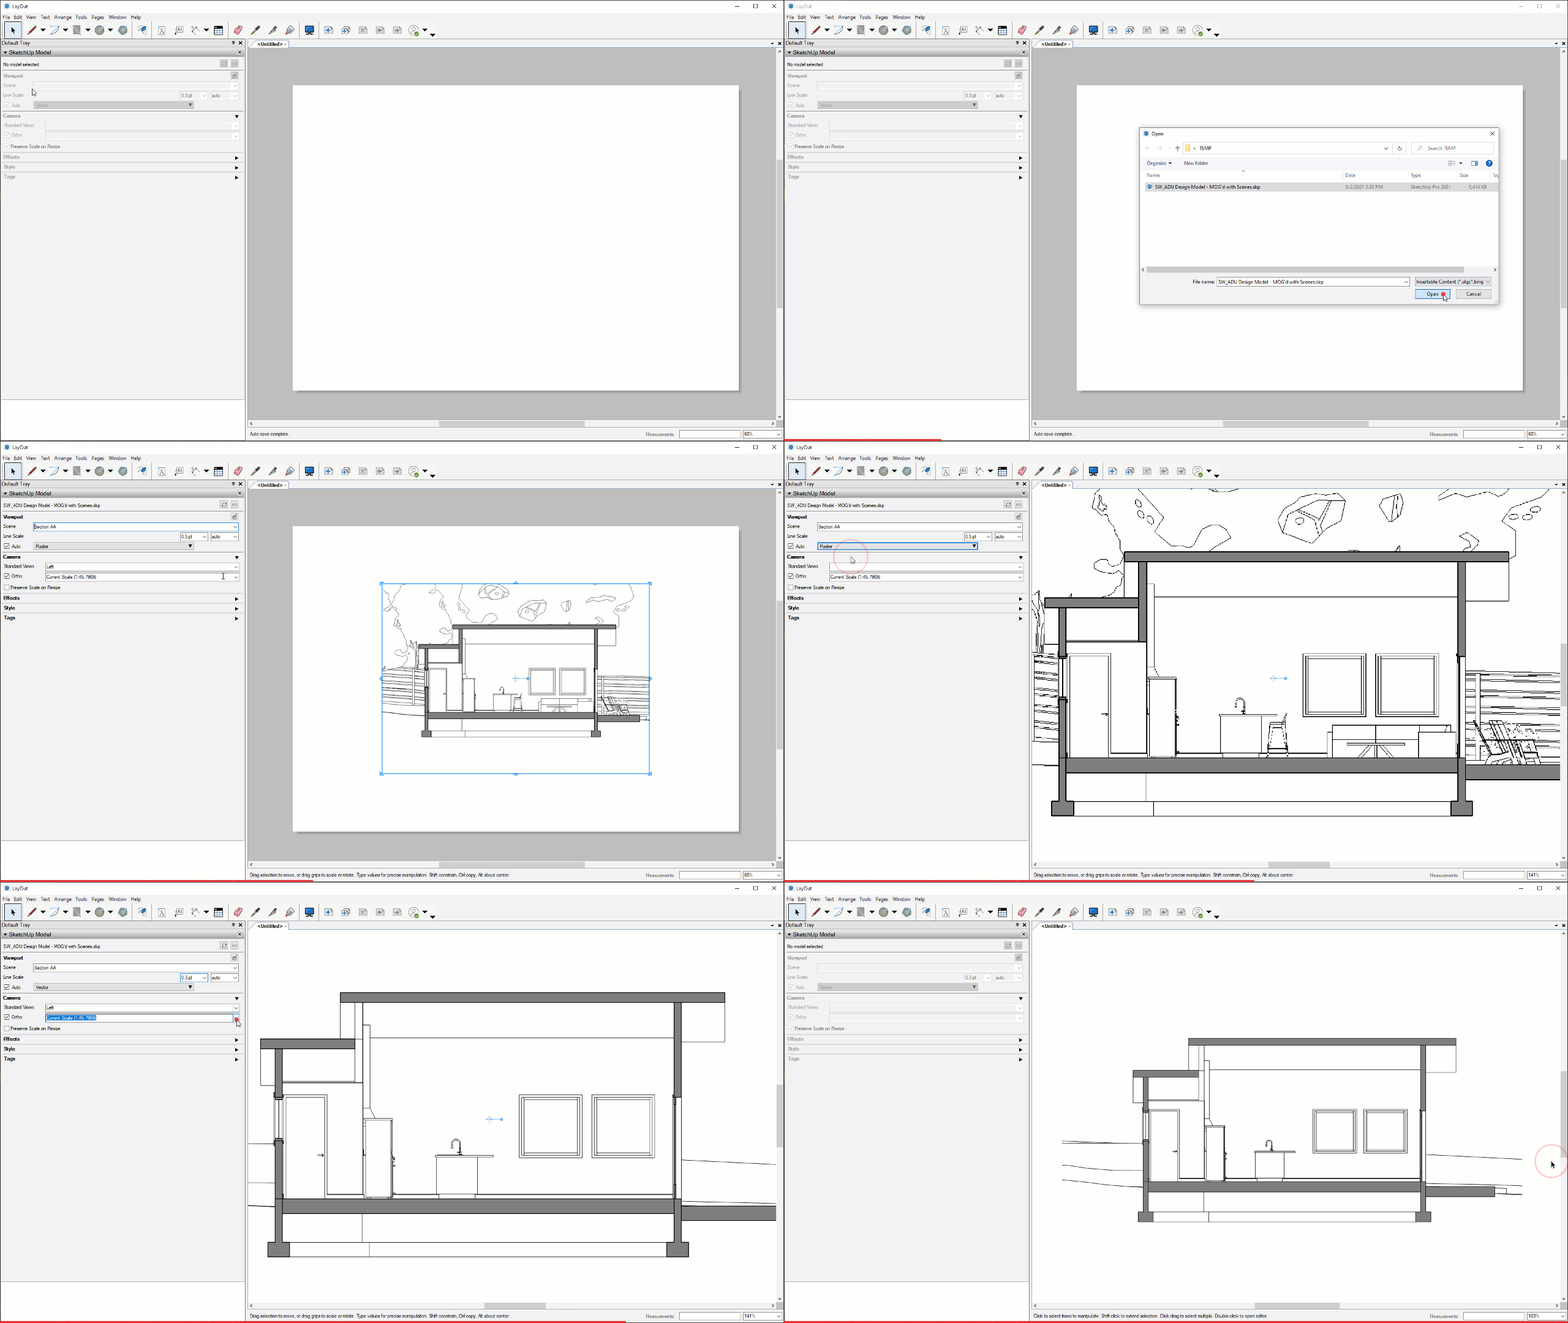
Building Section Drawing
1. Click the File dropdown > Insert...
2. Find the folder containing your SketchUp model and select it, click "Open"
3. In the SketchUp Model inspector,
- Scene: "Building Section"
- Line scale: .3
- Render Setting: Vector
- Architectural Scale: 1/4" = 1'-0"
4. Render the viewports, or check Auto on.
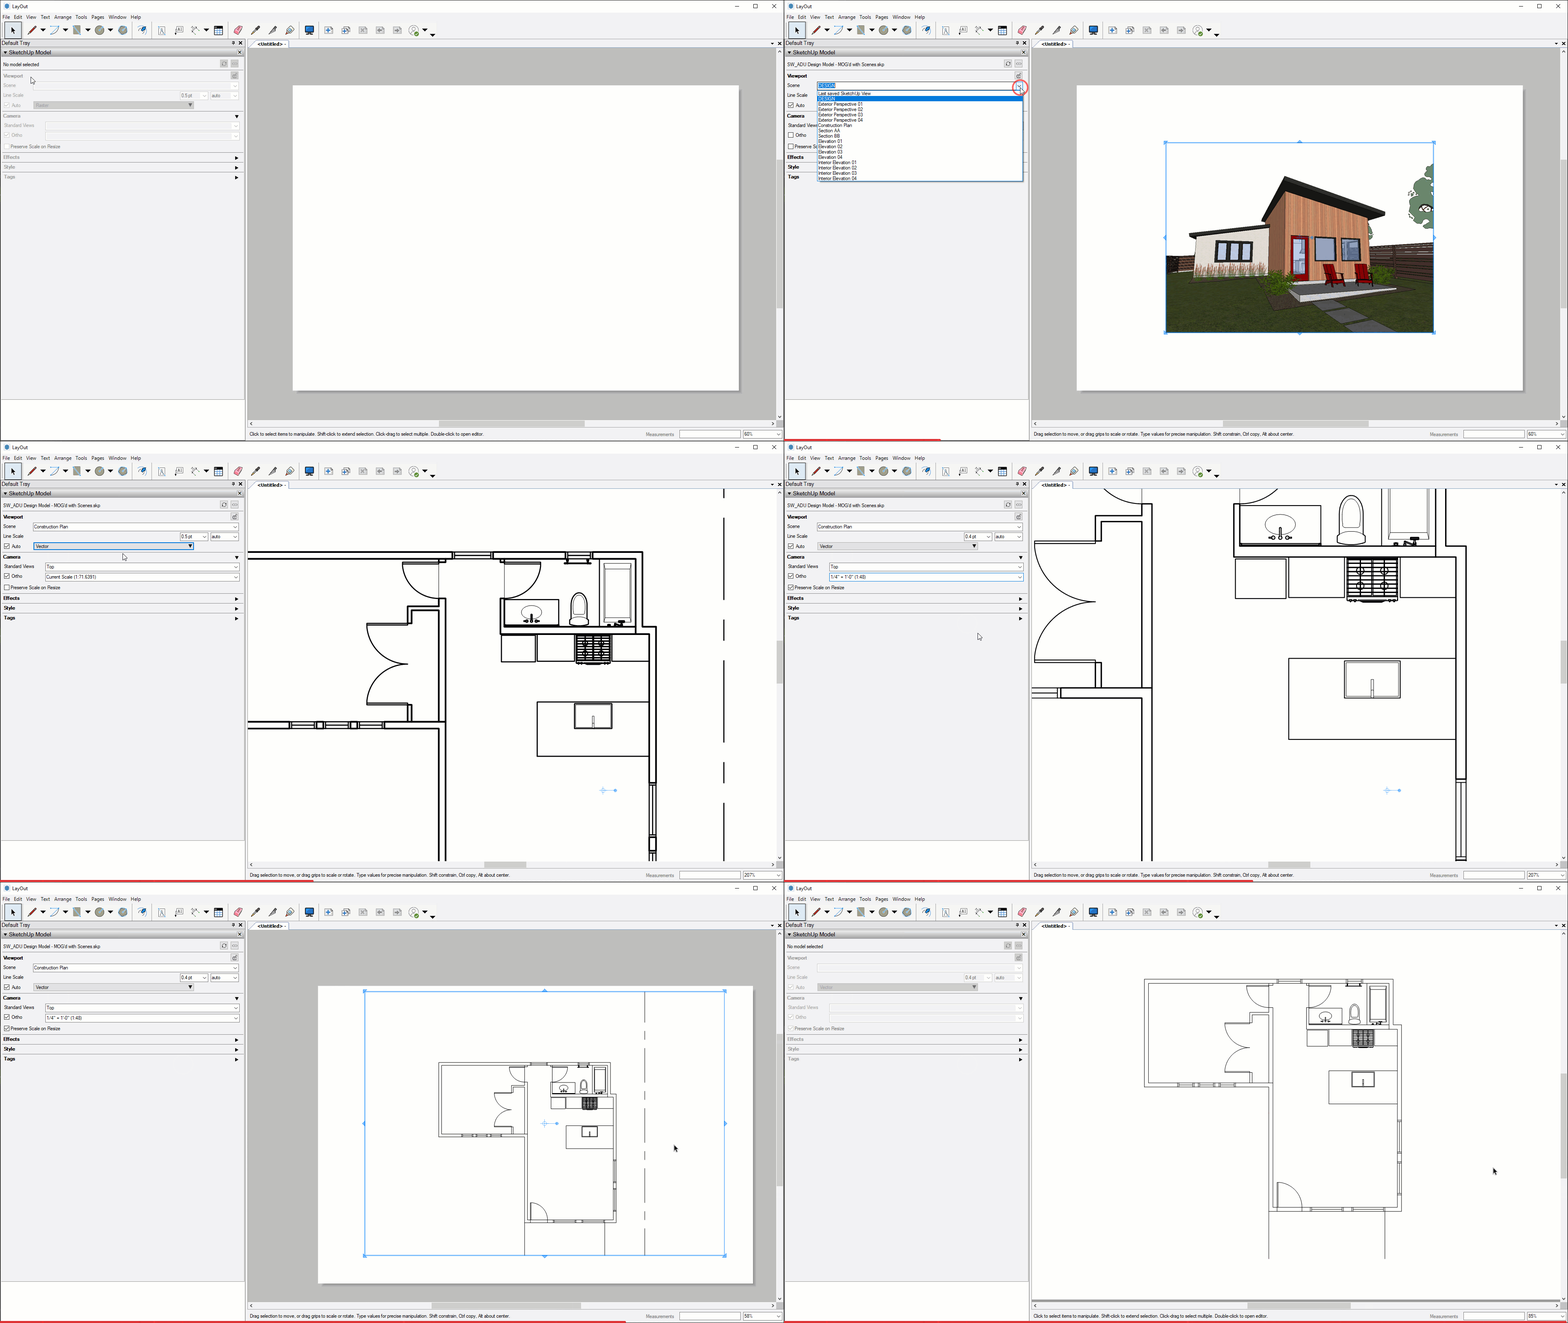
Plan Drawing
1. Click the File dropdown > Insert...
2. Find the folder containing your SketchUp model and select it, click "Open"
3. In the SketchUp Model inspector,
- Scene: "Plan"
- Line scale: .4
- Render Setting: Vector
- Architectural Scale: 1/2" = 1'-0"
4. Render the viewports, or check Auto on.
Instruction
You will need these files to follow along...
