PROJECT: ADU Concept Sketches
Unlike many other modeling programs, SketchUp is a surface modeler. The most basic building blocks in SketchUp are edges and surfaces, used to represent even the most complex objects. In this exercise you will learn to draw, segment, and divide edges, and create, delete, and heal surfaces. A full understanding of these basic building blocks is the solid foundation for moving into more complex modeling tasks.
After completing this project, students will be able to:
- Produce accurate geometry with perfect alignments by locking axes and inferences
- Combine additive and subtractive modeling techniques to efficiently draw sketch floor plans and 3d models.
- Apply and edit materials from the SketchUp material library.
- Export images to email, print, and present.
Design Task
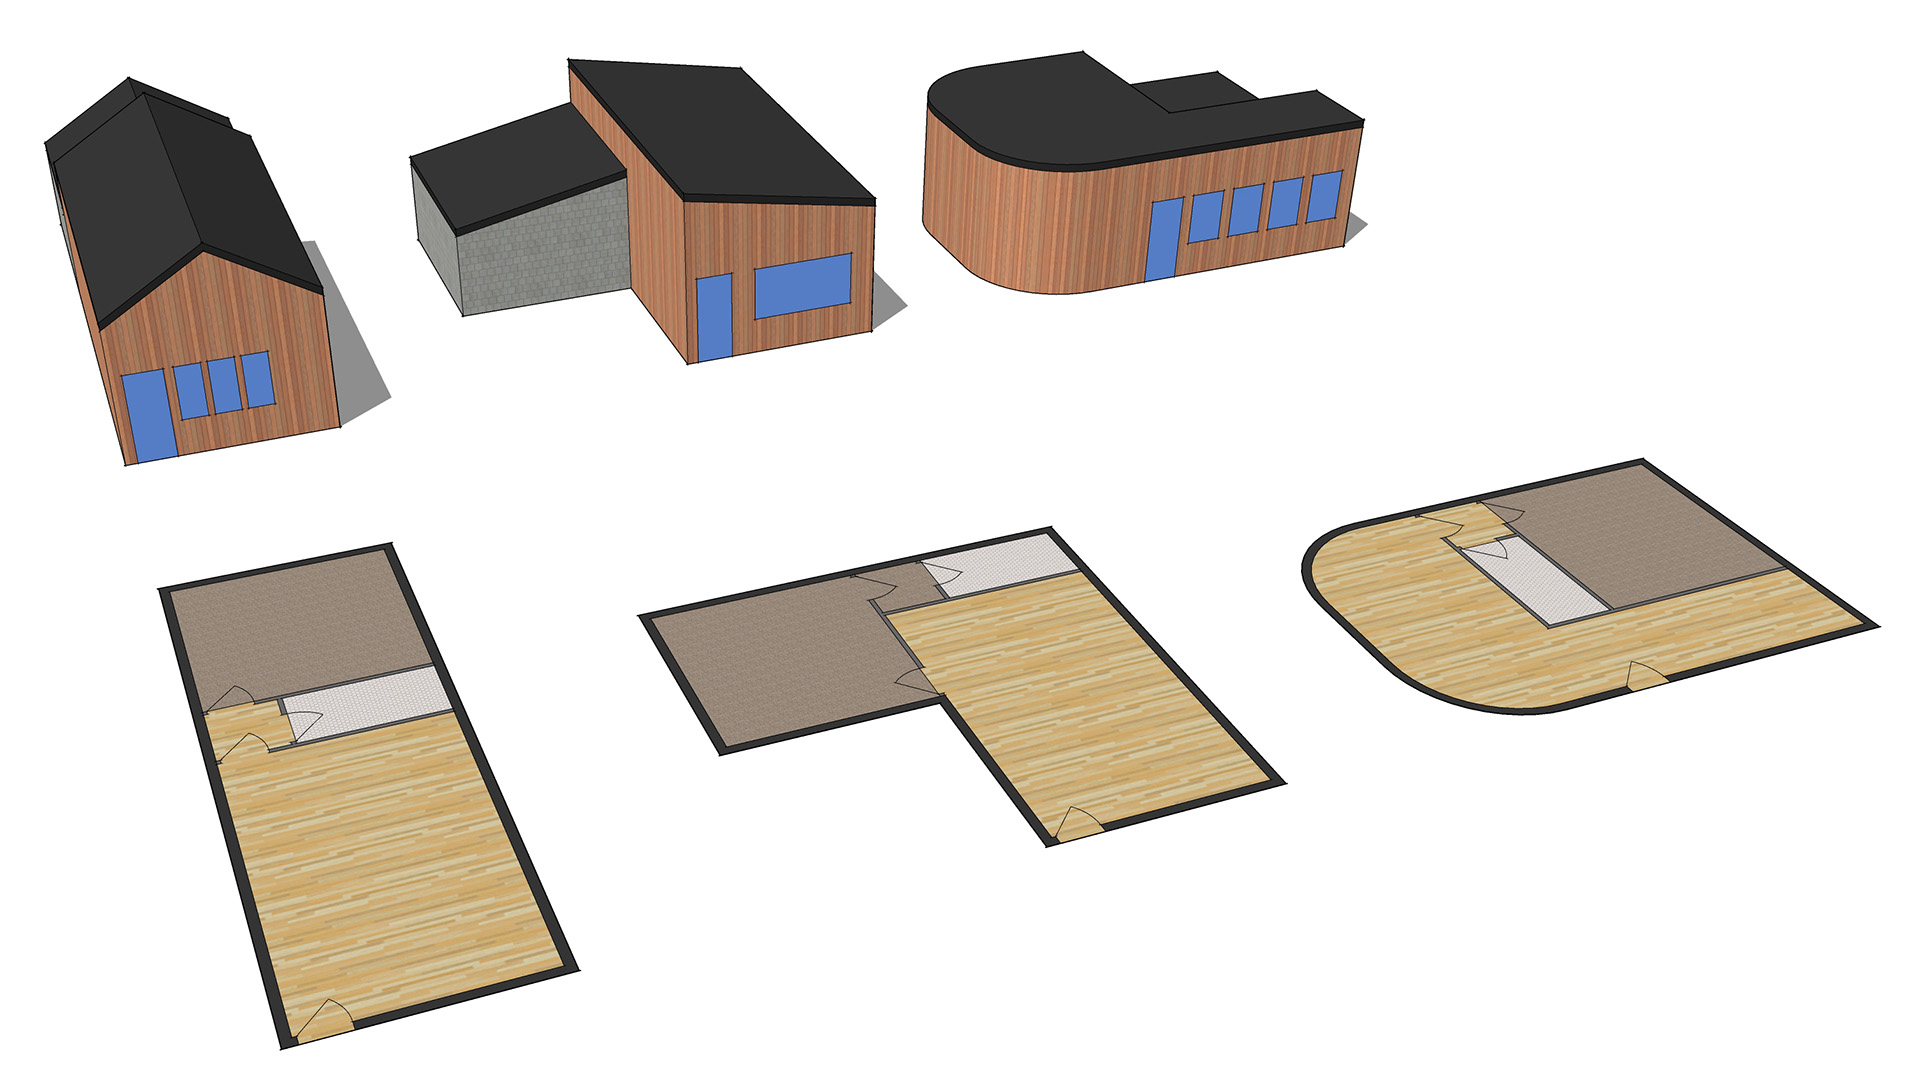
Alright designer! We started working with this client months ago, and they are finally ready to get started. First, we need to figure out their style. Let's work up 3 quick concept plans for a mountain modern cabin, and 3 possible exterior forms. Their lot and ambitions are huge, but their budget is tiny, so we will keep this one to 675sf.
Program:
- Bedroom
- Bathroom
- Kitchen
- Living
Before you get started, here's a few pointers to bring together everything you have learned so far...
Drawing and Modifying Geometry
SketchUp has a unique way of handling geometry. Keep these tips in mind.
- The most simple building block in SketchUp is an edge.
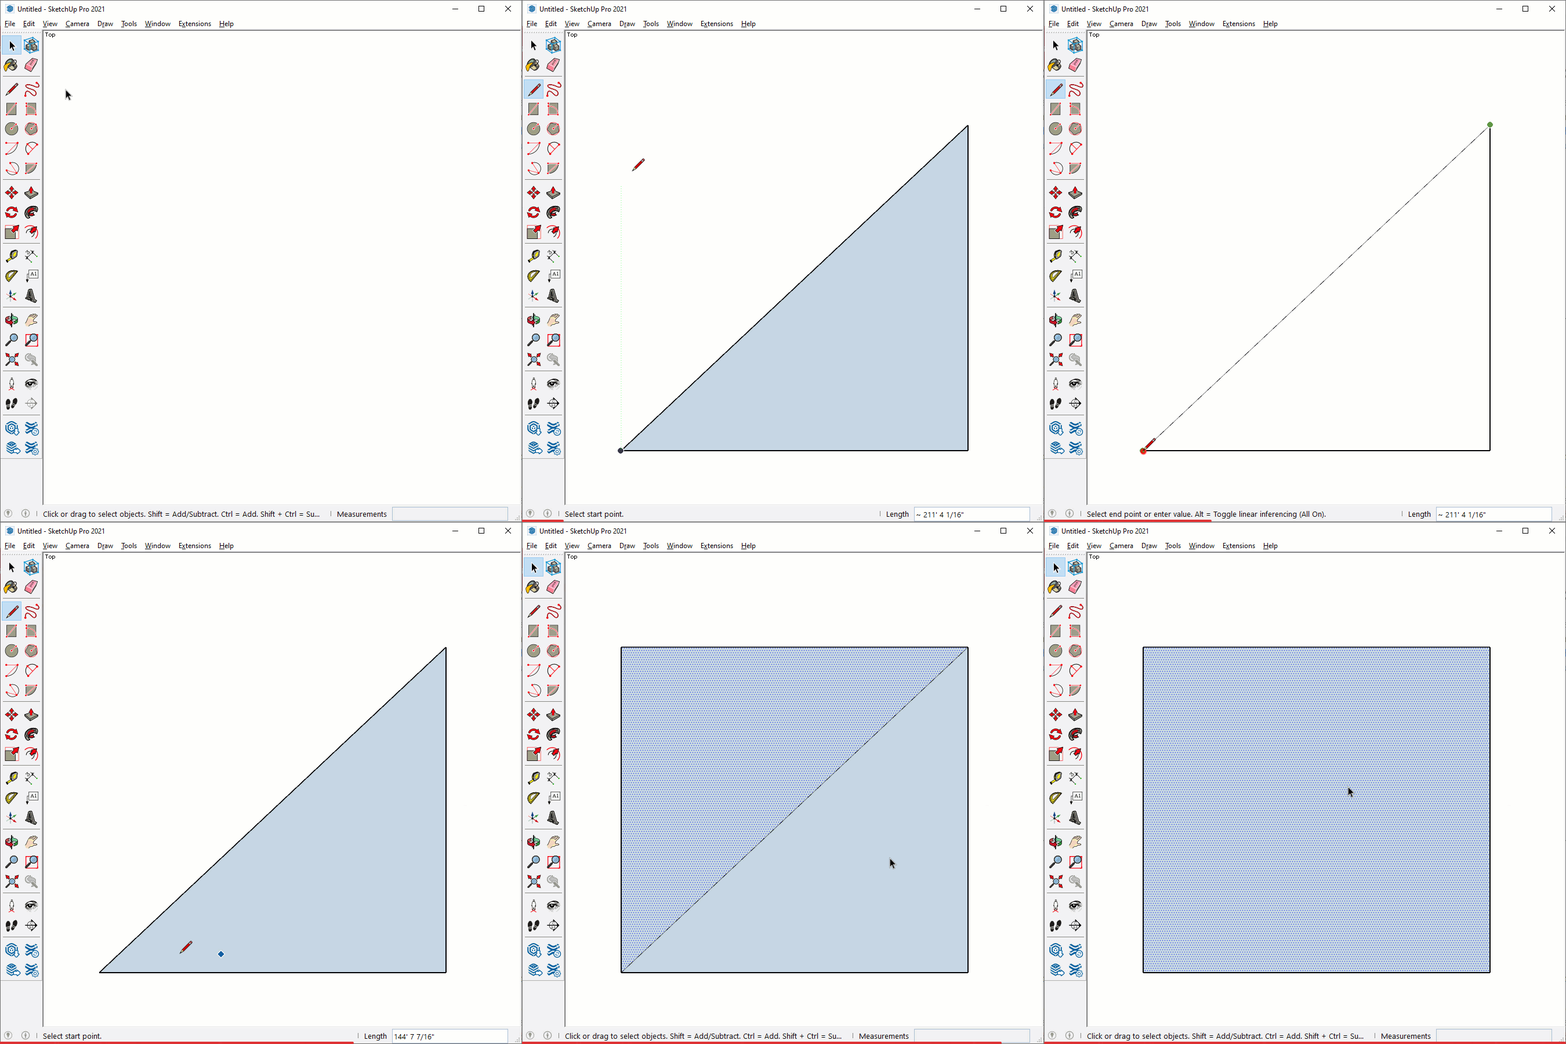
- Three coplanar edges connected end to end create the most simple surface possible in SketchUp, a triangle.
- Delete any coplanar edge that surrounds a surface and the surface disappears
- Redraw the edge and a new surface appears.
- A surface can be deleted by right-clicking on it, then choose "Delete".
- A missing surface can be "healed" by tracing over any one of its' surrounding edges.
- Surfaces can be divided by edges, or joined by deleting the dividing coplanar edges.
Modeling Strategy
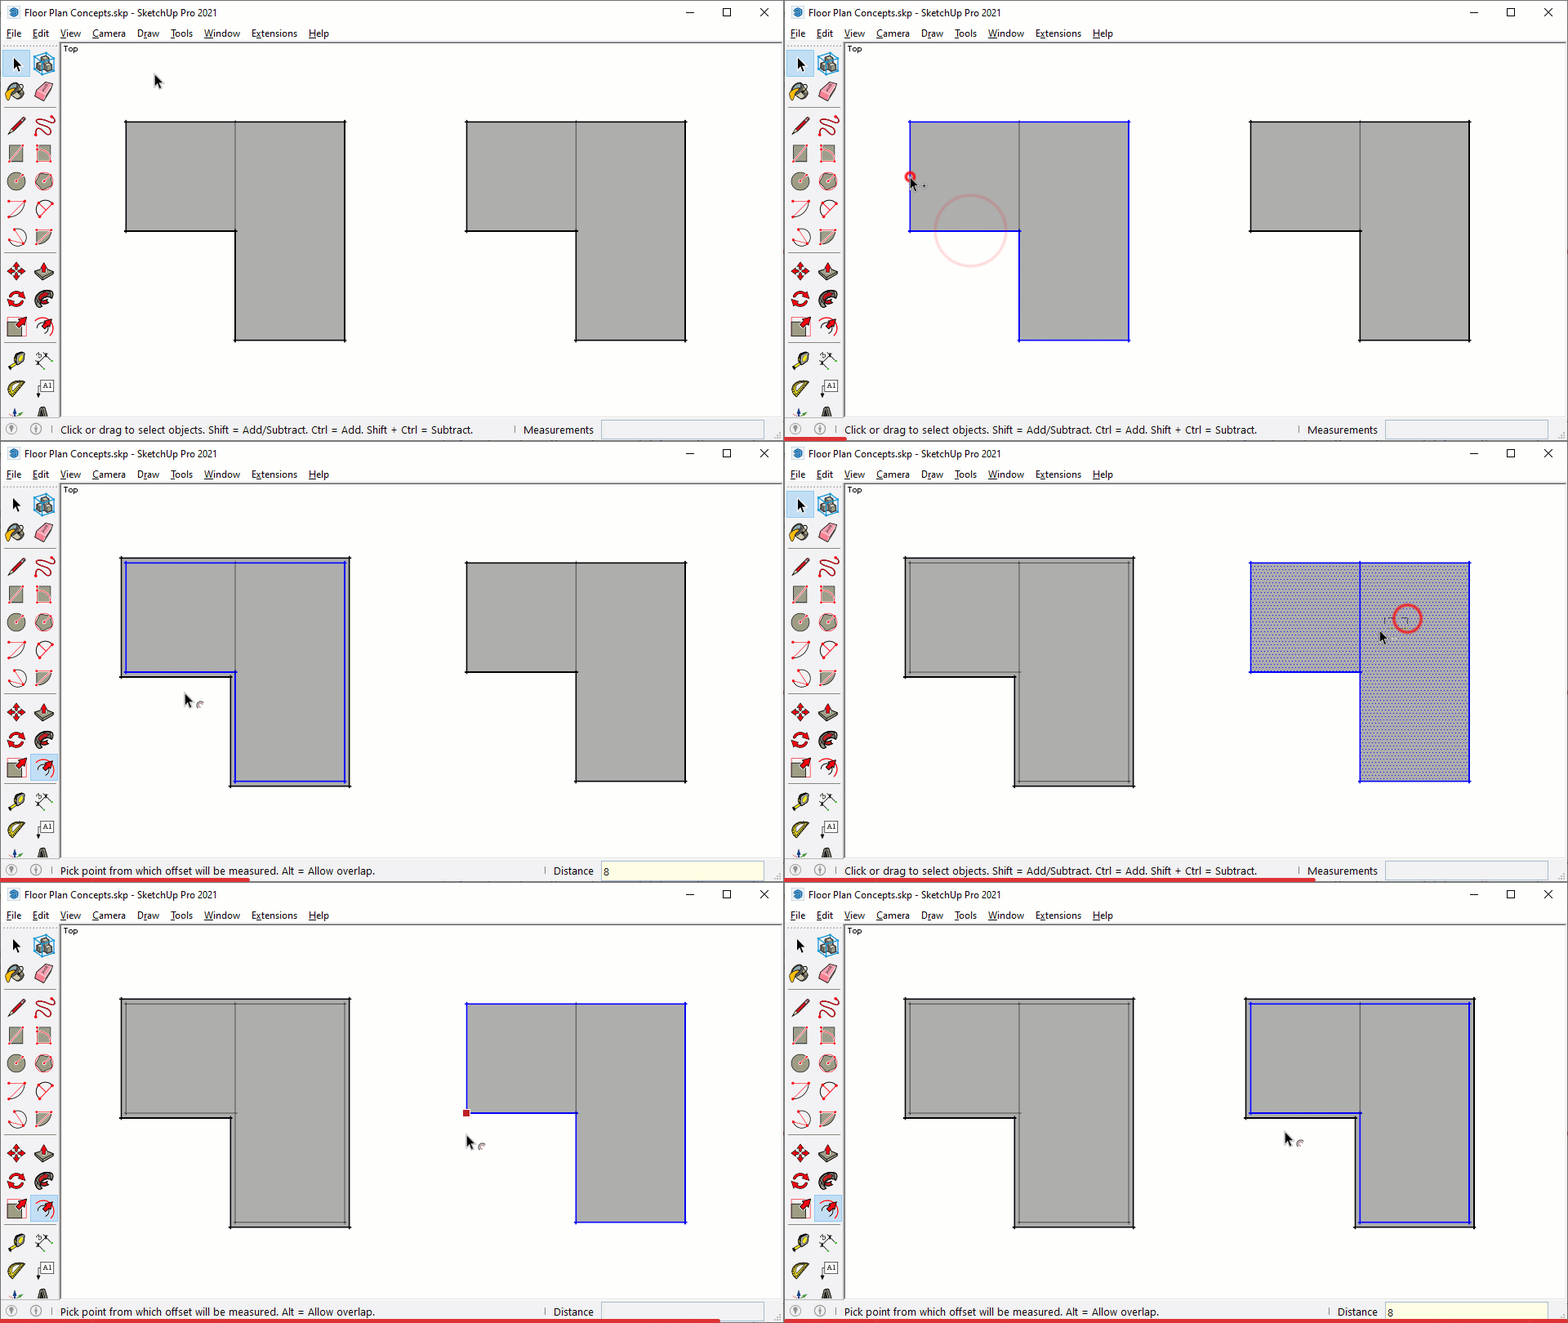
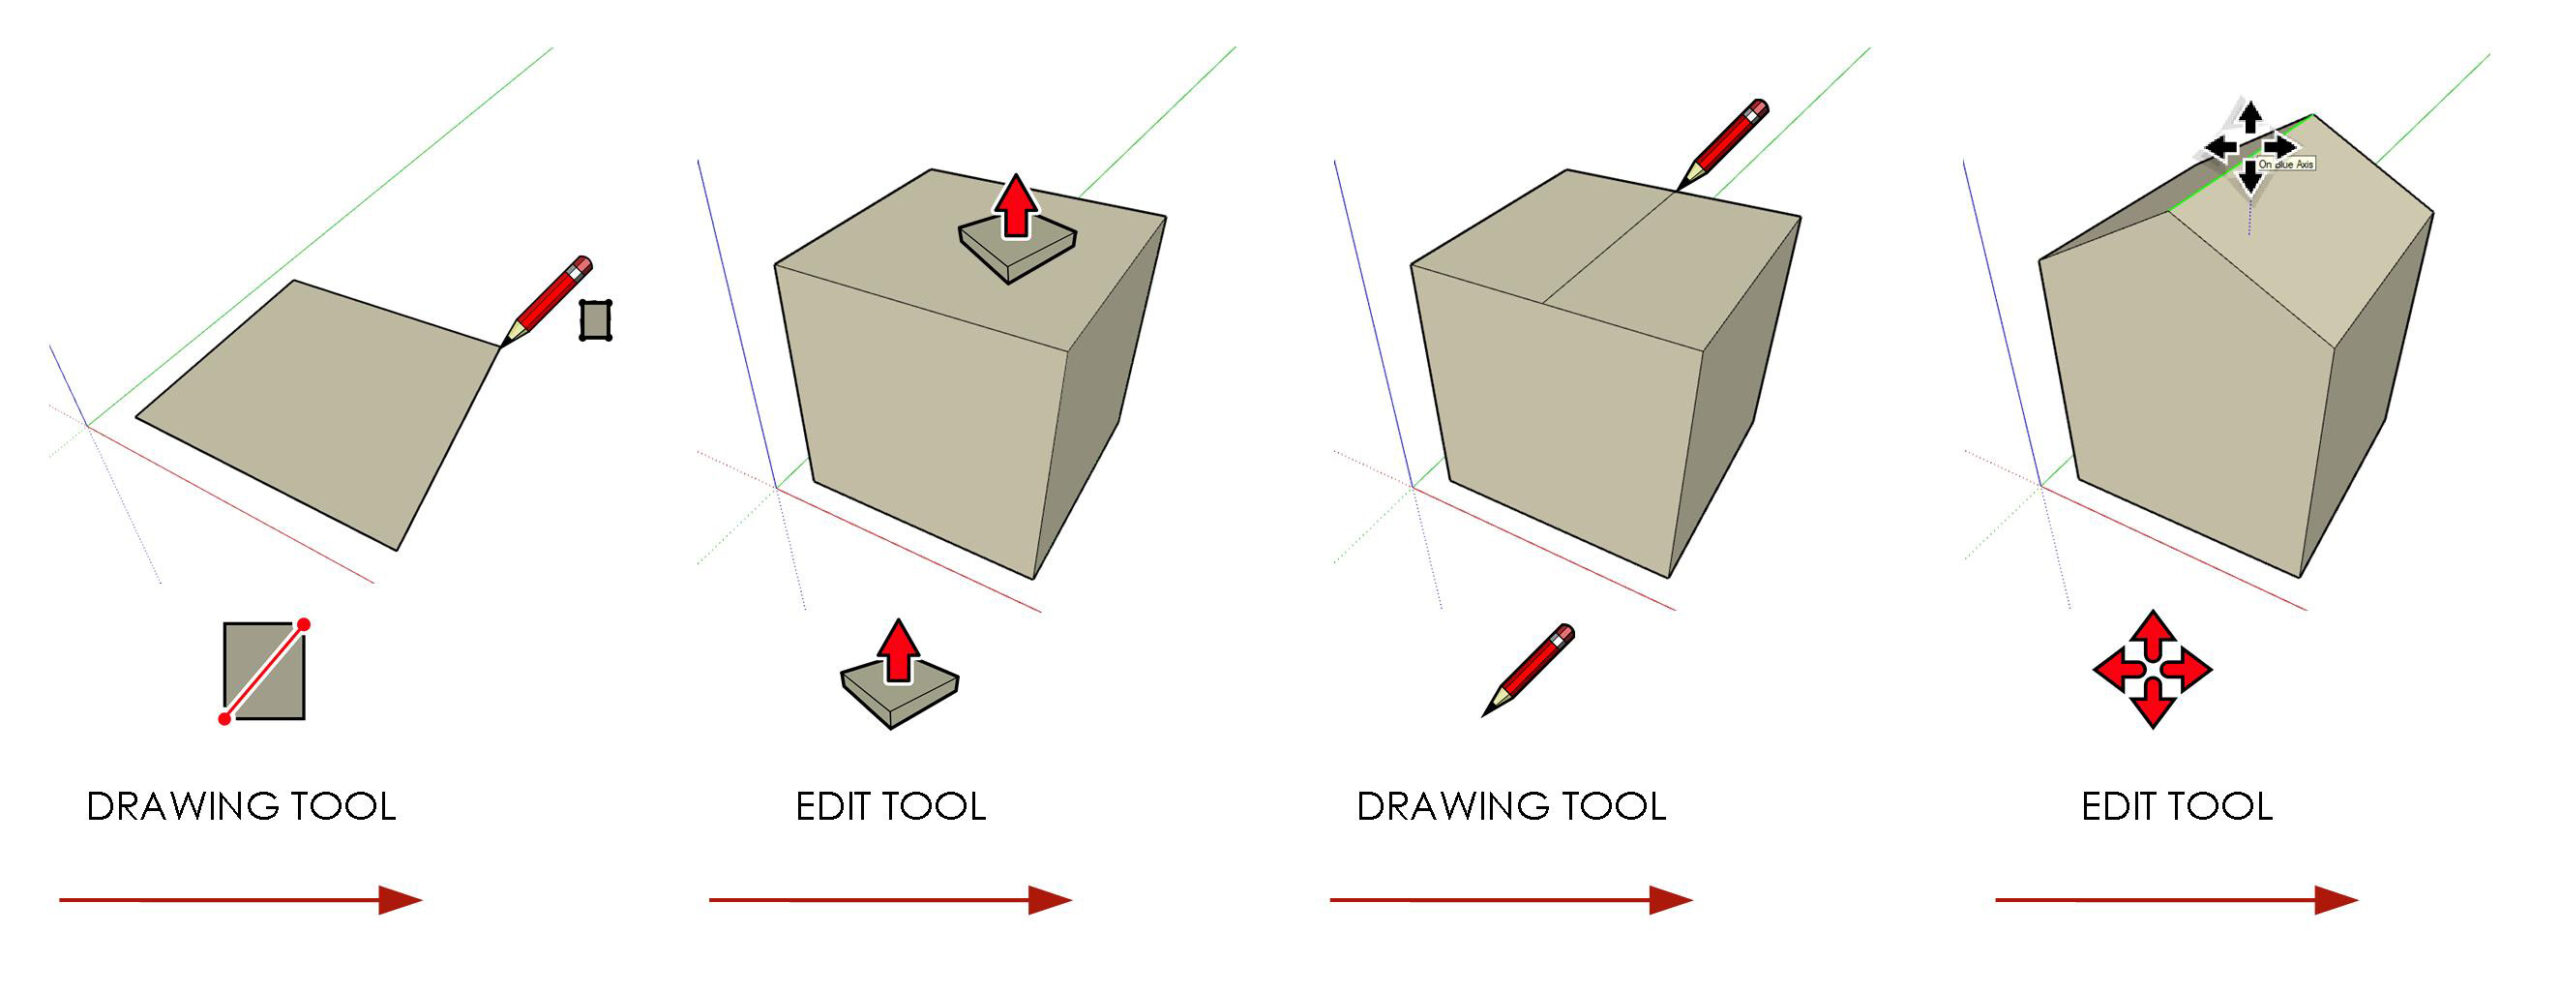
You have learned the Drawing tools and the Edit tools independently, but they are best utilized together. To get started with any model, you must first create geometry using the Drawing tools (Line, Rectangle, Circle, Arc, Polygon, and Freehand). Once you've created simple 2D geometry, you can shape and change that geometry into a more complex form using the Edit tools (Move, Push/Pull, Rotate, Follow Me, Scale, and Off set). Throughout the modeling process, you will bounce back and forth between these toolsets.
DIG DEEPER... Check out page 000 of "The SketchUp Workflow for Architecture".
Strategic Selections
Many operations in SketchUp are faster and easier when a selection is made before activating the tool. If you find yourself tediously picking through a model, know there is always a way to combine selection techniques to make complex selections easier. When making selections, consider whether it will be easier to pick the pieces one at a time, or perhaps it will be easier to select everything then remove pieces one at a time. There is no absolute right or wrong way to make selections, just remember that there are modifier keys that will make selecting entities much faster.
A quick reminder of all the Select tool operations...
- A single click selects any entity in SketchUp.
- A double click on a surface will select the surface as well as the bounding edges.
- A quick triple click on a surface will select the surface and all connected geometry.
- click and drag from left to right to draw a solid selection window, which only selects the entities that are completely within the selection window.
- click and drag from right to left to draw a dashed selection window, which selects entities within the window, and any entities the dashed selection window touches.
- Add entities to a selection by holding down the Ctrl key (Option on Mac) while the Select tool is active.
- Remove entities from a selection by holding down the Ctrl (Option on Mac) and Shift keys while the Select tool is active.
- Invert a selection by holding the Shift key while the Select tool is active.
Guides
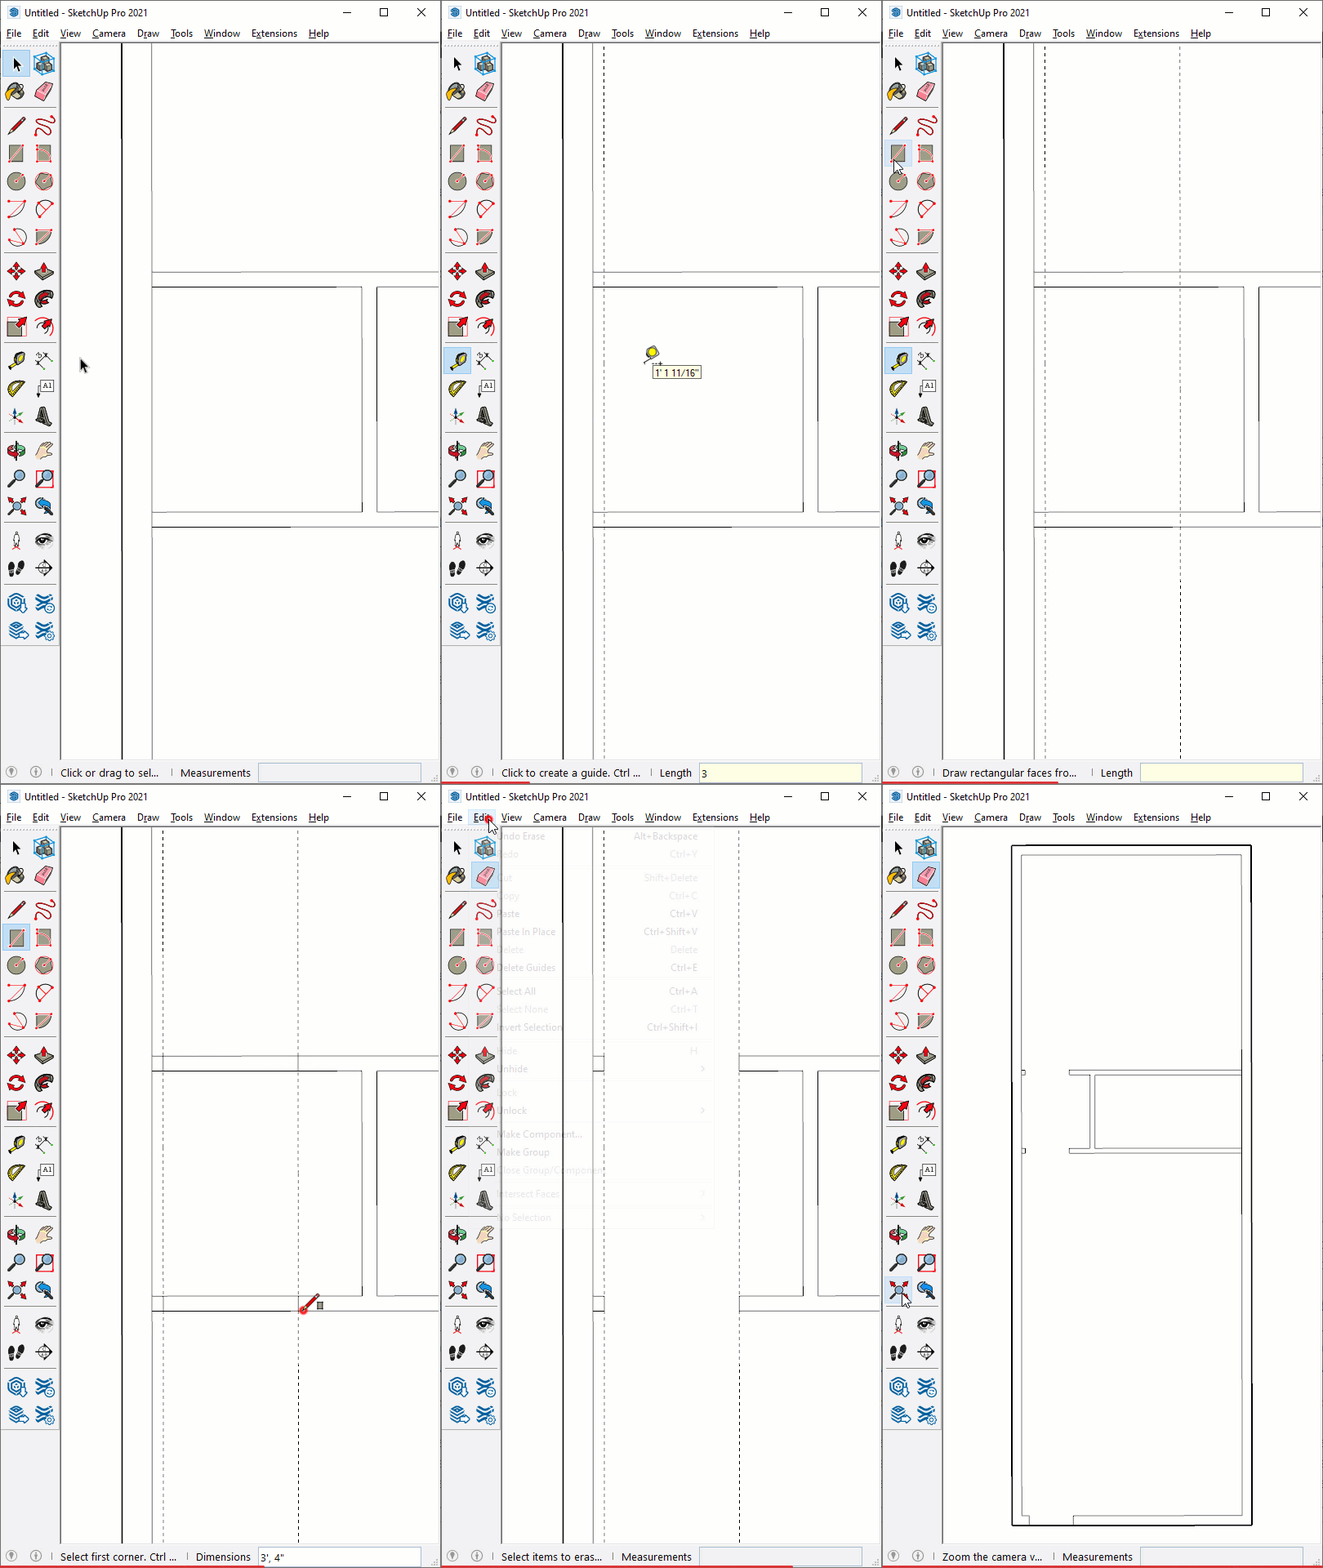
Guides are temporary lines that extend infinitely to the horizon. Guides are better than typical "construction geometry" because they don't stick to other edges, and they can be all be easily hidden or deleted at the same time. To create a guide, follow these steps...
- Activate the tape measure tool.
- Create guides is enabled by default and can be toggled with the Ctrl key (Option on Mac).
- Hover on an edge, not a point, and click.
- Move your cursor away from the edge, enter a precise dimension.
Keep these tips in mind when working with guides...
- Guides can be modified similar to edges, move, copy, rotate, and erase.
- When creating guides, tap the arrow keys to lock an axis, or hold Shift to lock the active axis/inference.
- Click on an edge to make a line guide, or click on a point to make a point guide.
- Once you are finished using the guides, you can delete them one by one with the Eraser tool, or click the Edit dropdown > Delete Guides to clear all guides.
Curved Surfaces
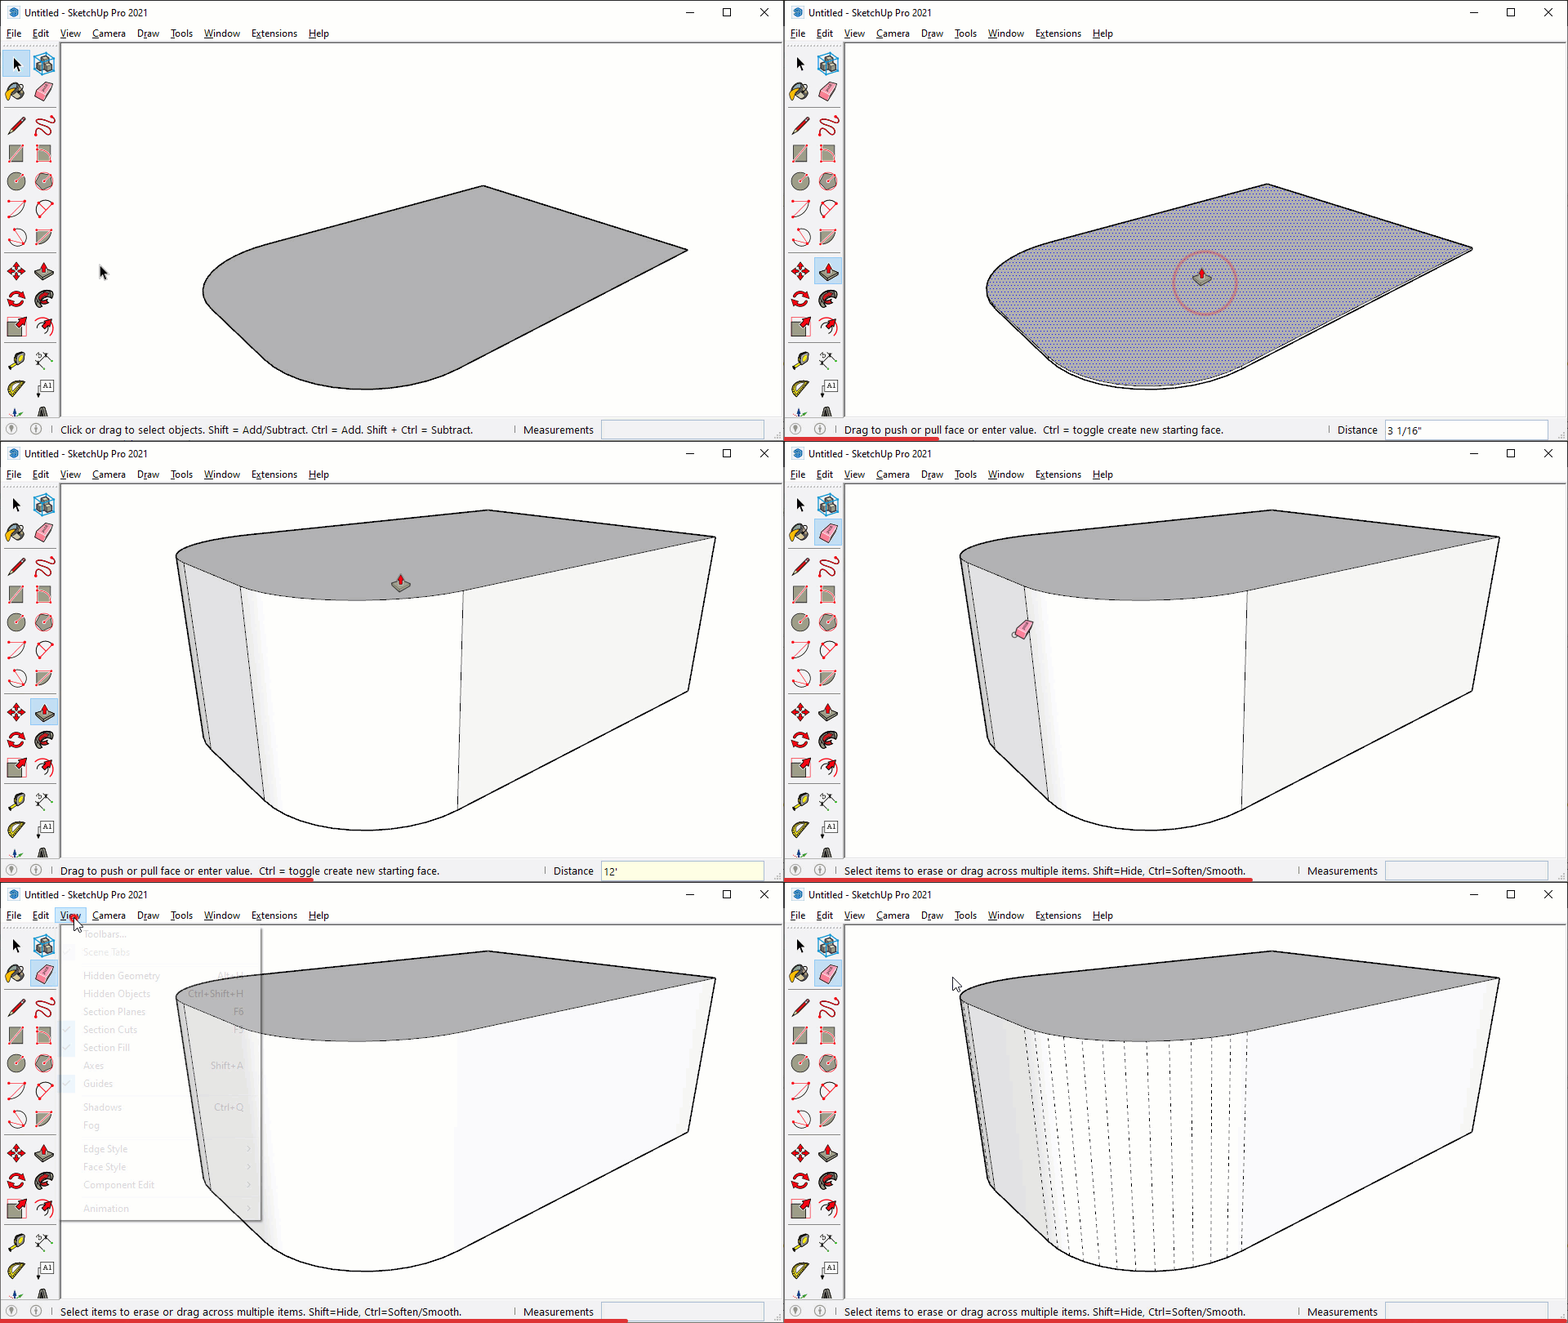
There are no true circles in SketchUp, only the illusion of a circle represented by edges. A circle or curved edge can be extruded into a surface, but there are no curved surfaces either, only flat surfaces arranged to display a curved surface. You can see behind the curtain of this illusion by turning on hidden geometry, just click on the View dropdown > Hidden Geometry. Softened edges that were previously invisible are now shown as dashed lines, typically a temporary state to help you modify geometry.
Keep these tips in mind when working with circles and curved surfaces...
- With the Eraser tool active, hold the Ctrl key (Option on Mac) to soften edges.
- With the Eraser tool active, hold the Ctrl key (Option on Mac) and the Shift key to unsoften edges.
- Select an edge, or series of edges, and toggle Soft on and off in the Entity Info dialog
- Right click on a selection and choose "Soften/Smooth Edges" to open the Soften Edges dialog, this affects the entire selection at the same time.
Instruction
No class files are needed to follow along...
Are you doing okay?
We would love to hear how things are going so far! Please take a moment to fill out the survey below...
