PROJECT: ADU Design Model
After completing this project, students will be able to:
- Construct a house in a logical sequence
- Utilize a prescribed system of model organization for architects and interior designers.
- Find, download, and insert objects. material libraries
- Convert a sketch floor plan into a background to build on top of.
Model Organization Guides (MOG's)
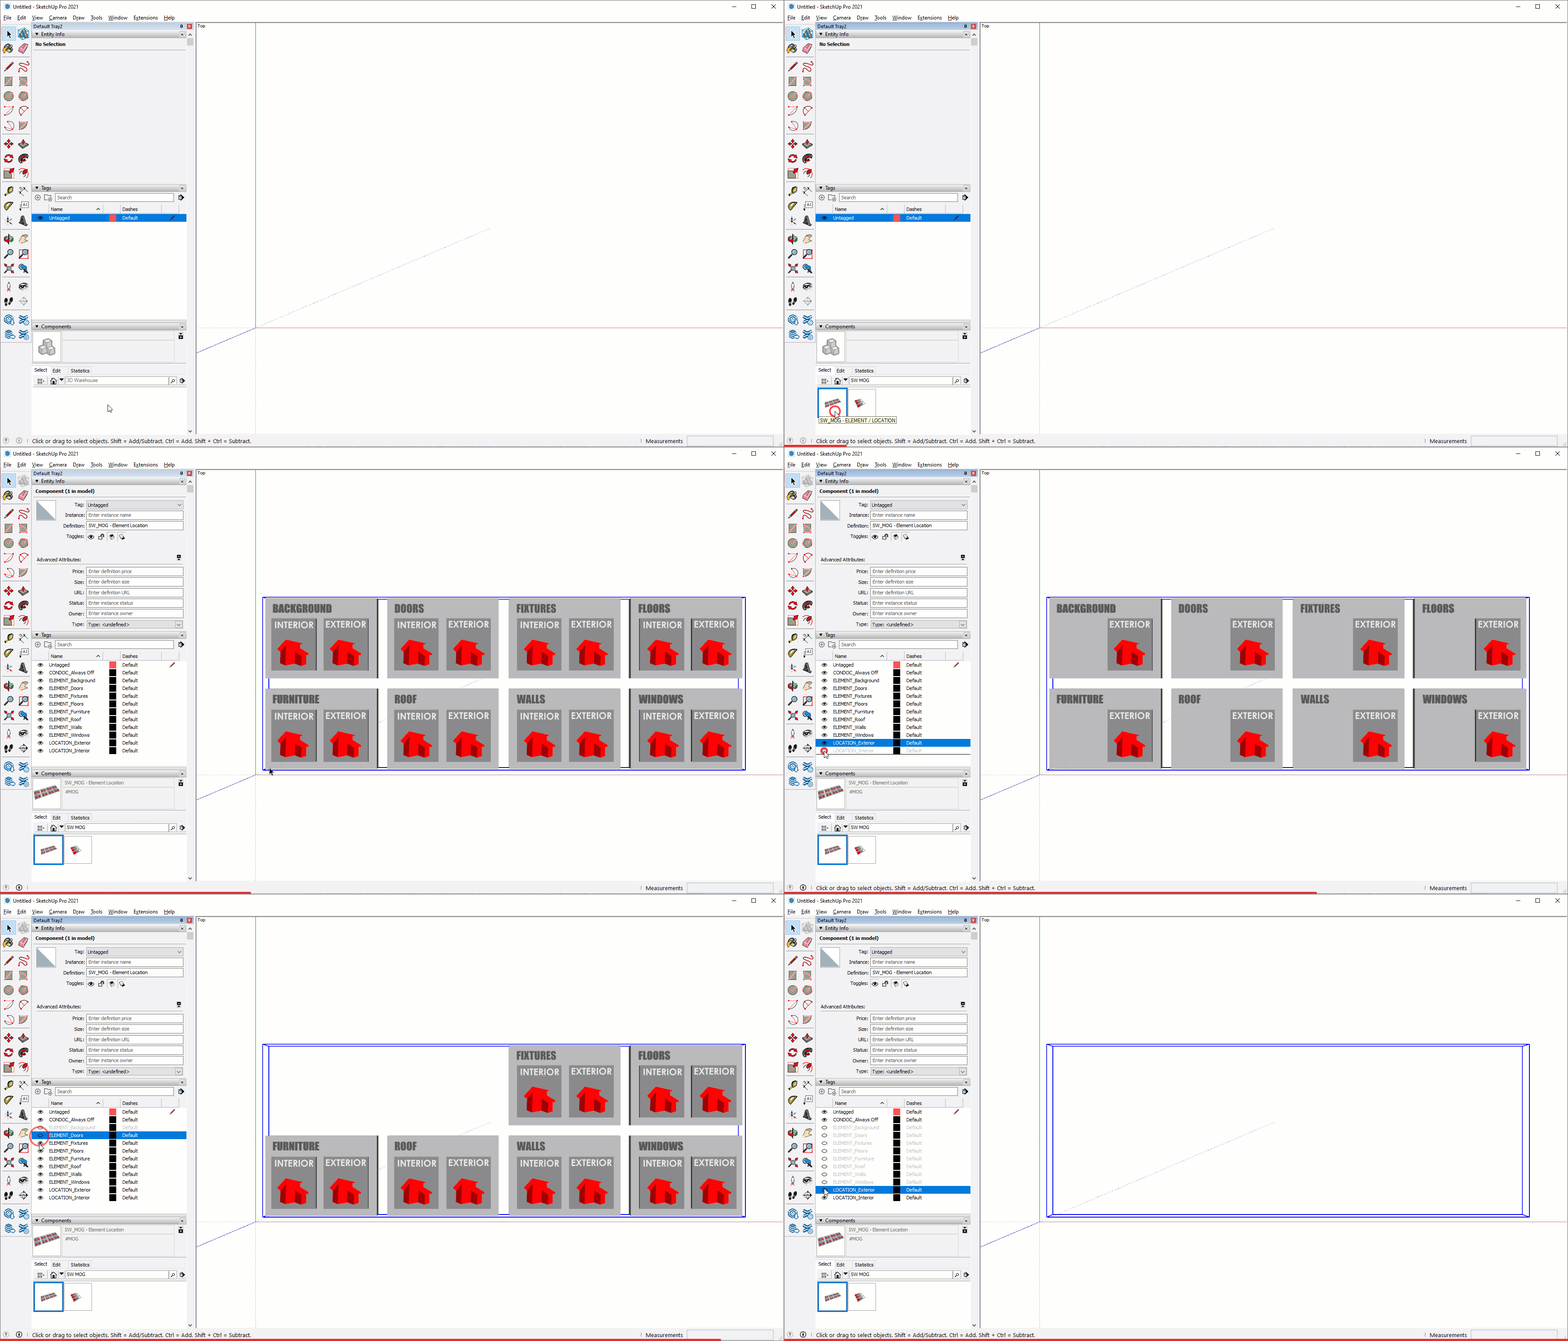
By far, the quickest and easiest way to organize your model. Just drag and drop a MOG to bring in a perfect grouping hierarchy with all nested tags applied. Here's a few things to keep in mind...
- Search "SW MOG" on the 3d warehouse for class file, place near the origin in your model.
- MOG's are completely grouped and layered, so all you have to do is click into the container you want, then build or paste in place.
- When using MOG's, you will never have to create organizational groups or assign tags.
- MOG's come in as components, so if you need several in one model they need to be made unique, or exploded then grouped.
Modeling from Plan
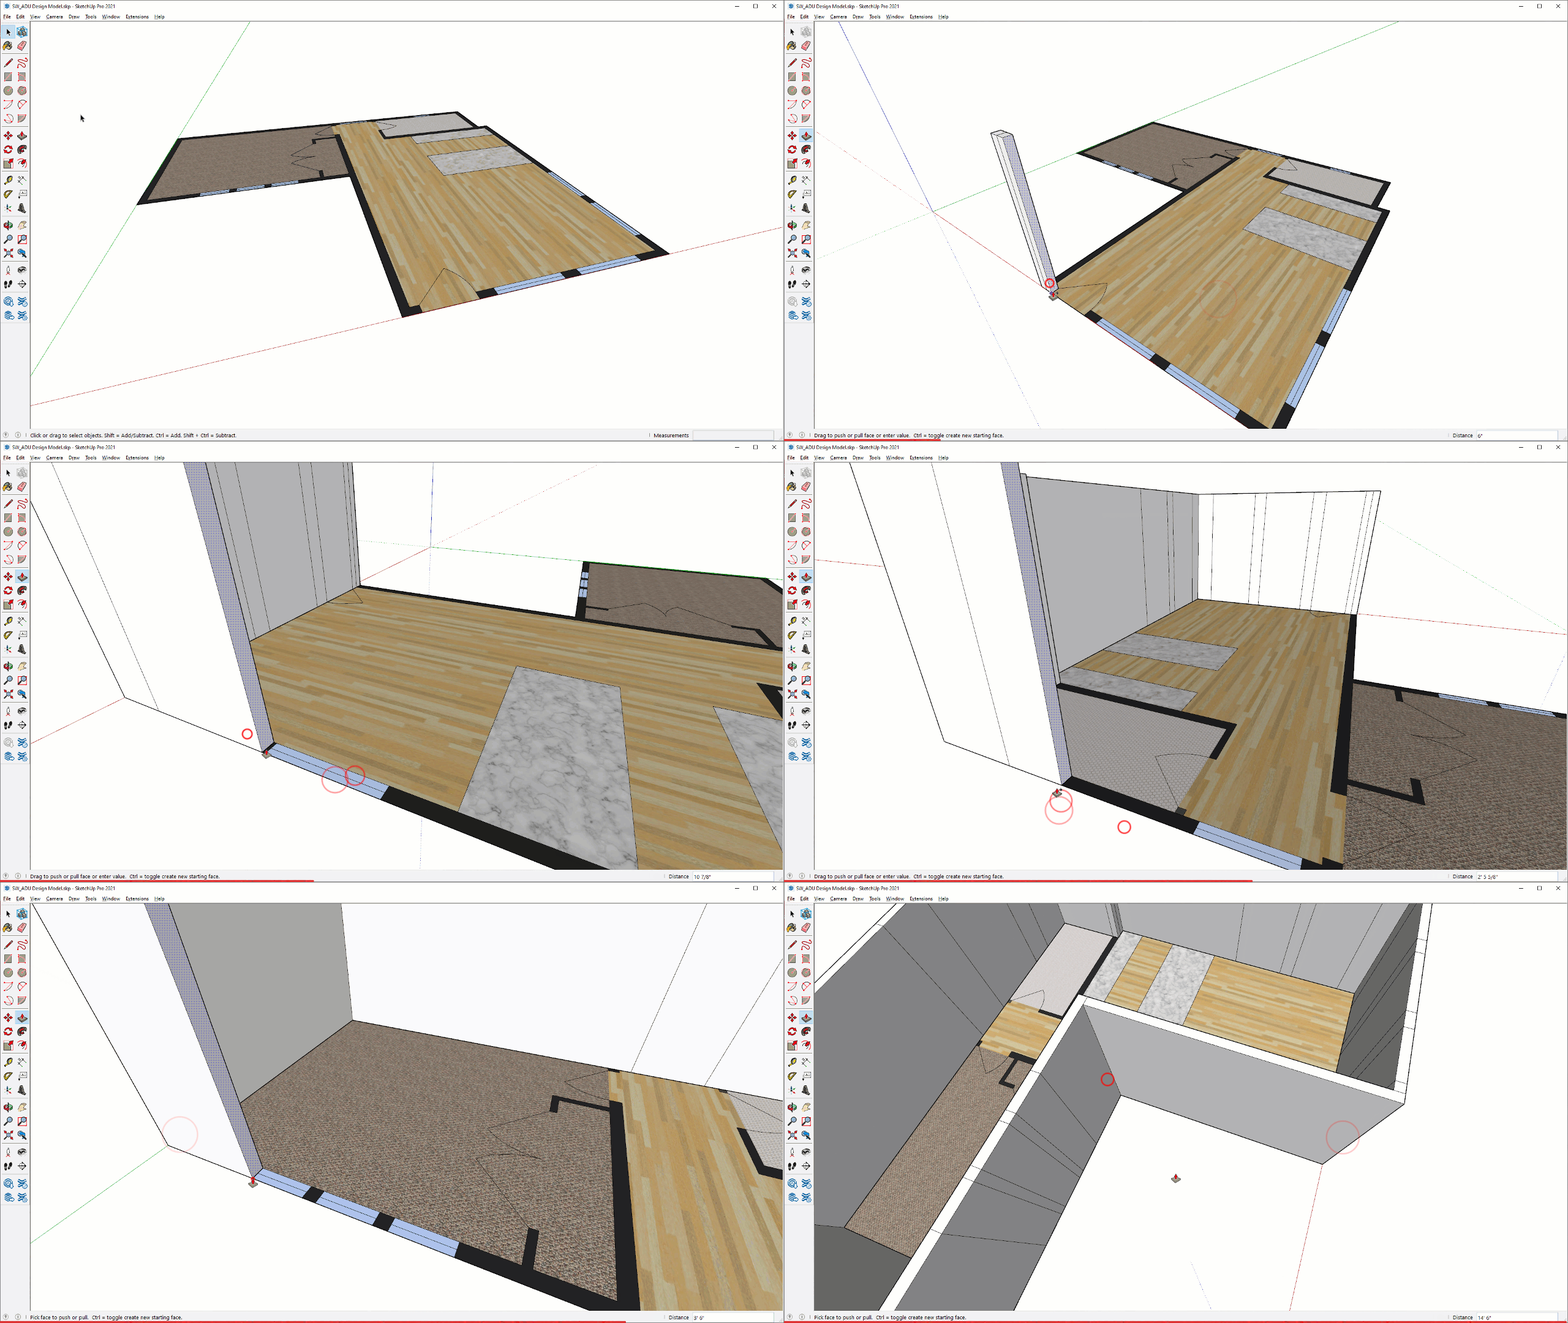
Fight the urge to pull the walls up, it is always best to extrude the walls horizontally. Keep these tips in mind...
- Use the Push Pull Tool to extrude the walls horizontally.
- Tap the Ctrl key (Option on Mac) to leave a copy of the starting face behind at each opening and corner.
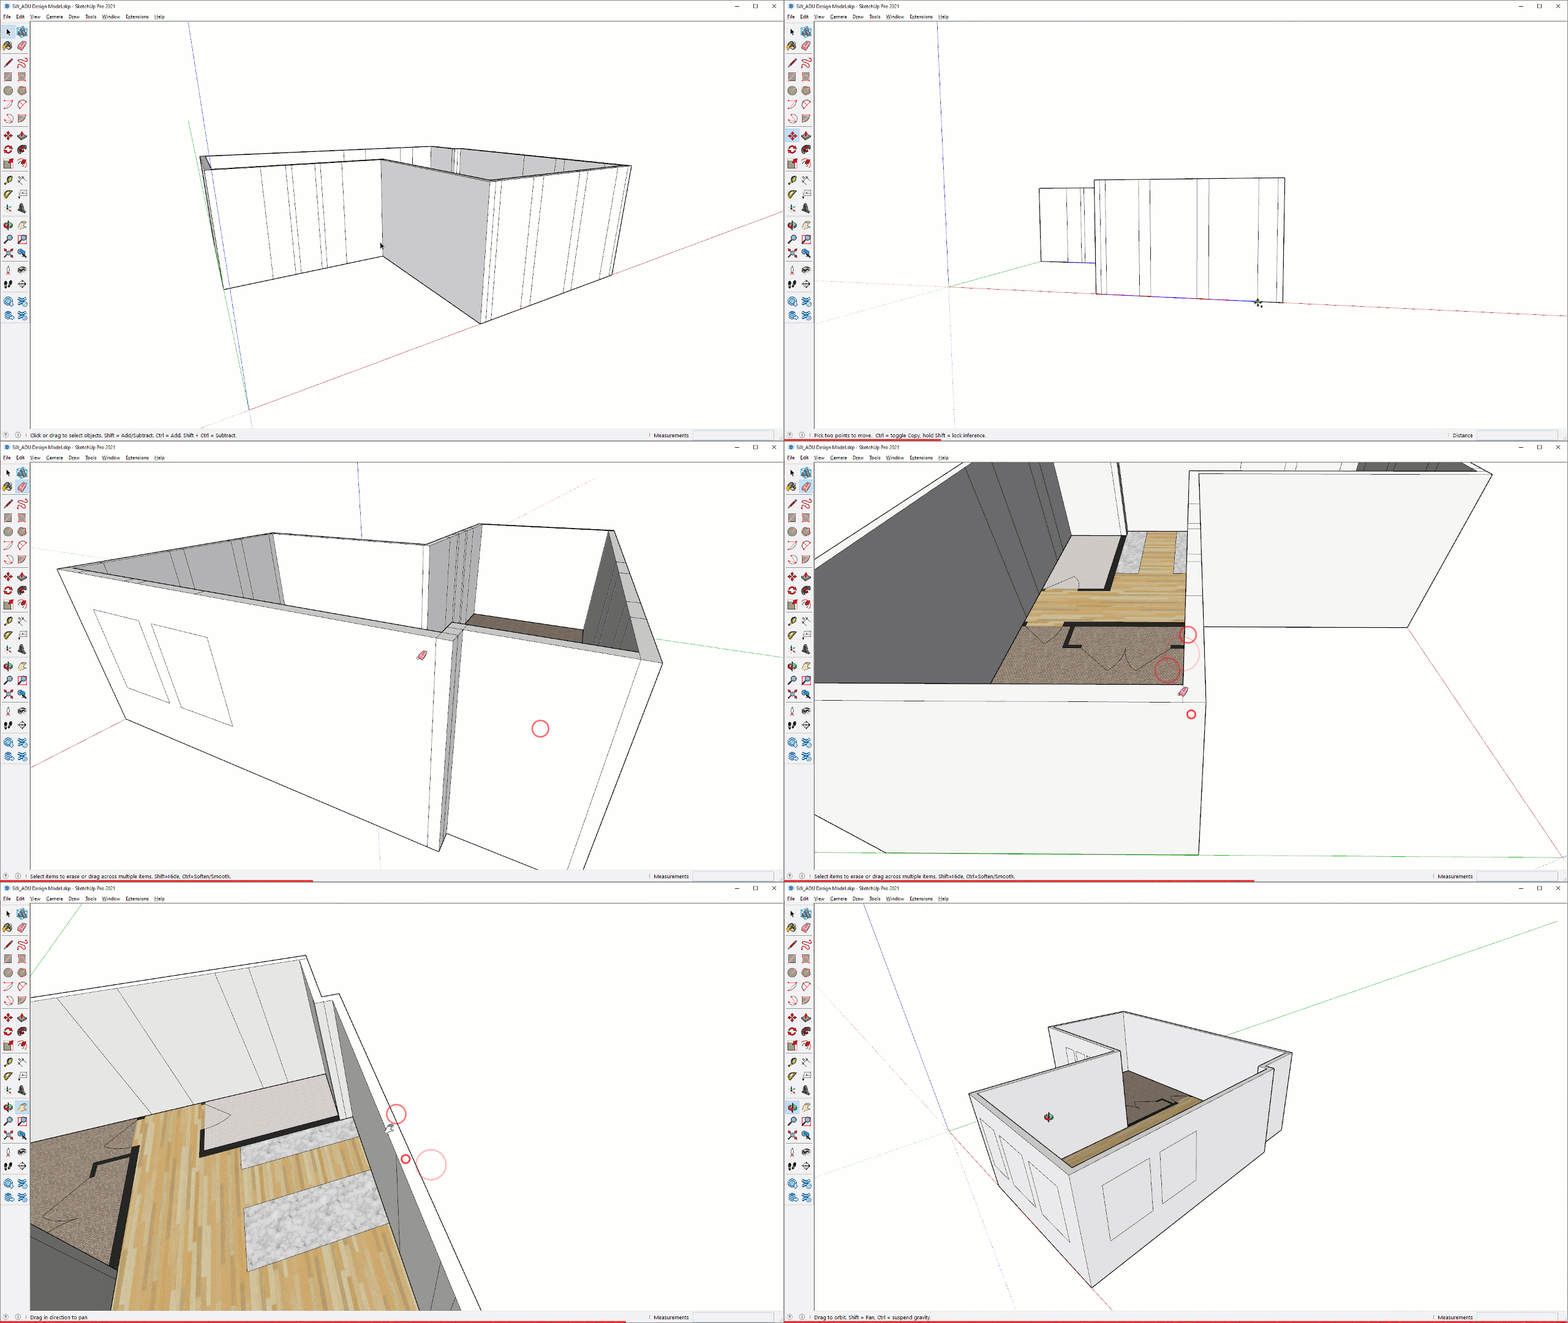
- Select just the bottom edges, then copy them up using the Move Tool.
- Clean up as you go with the Eraser Tool.
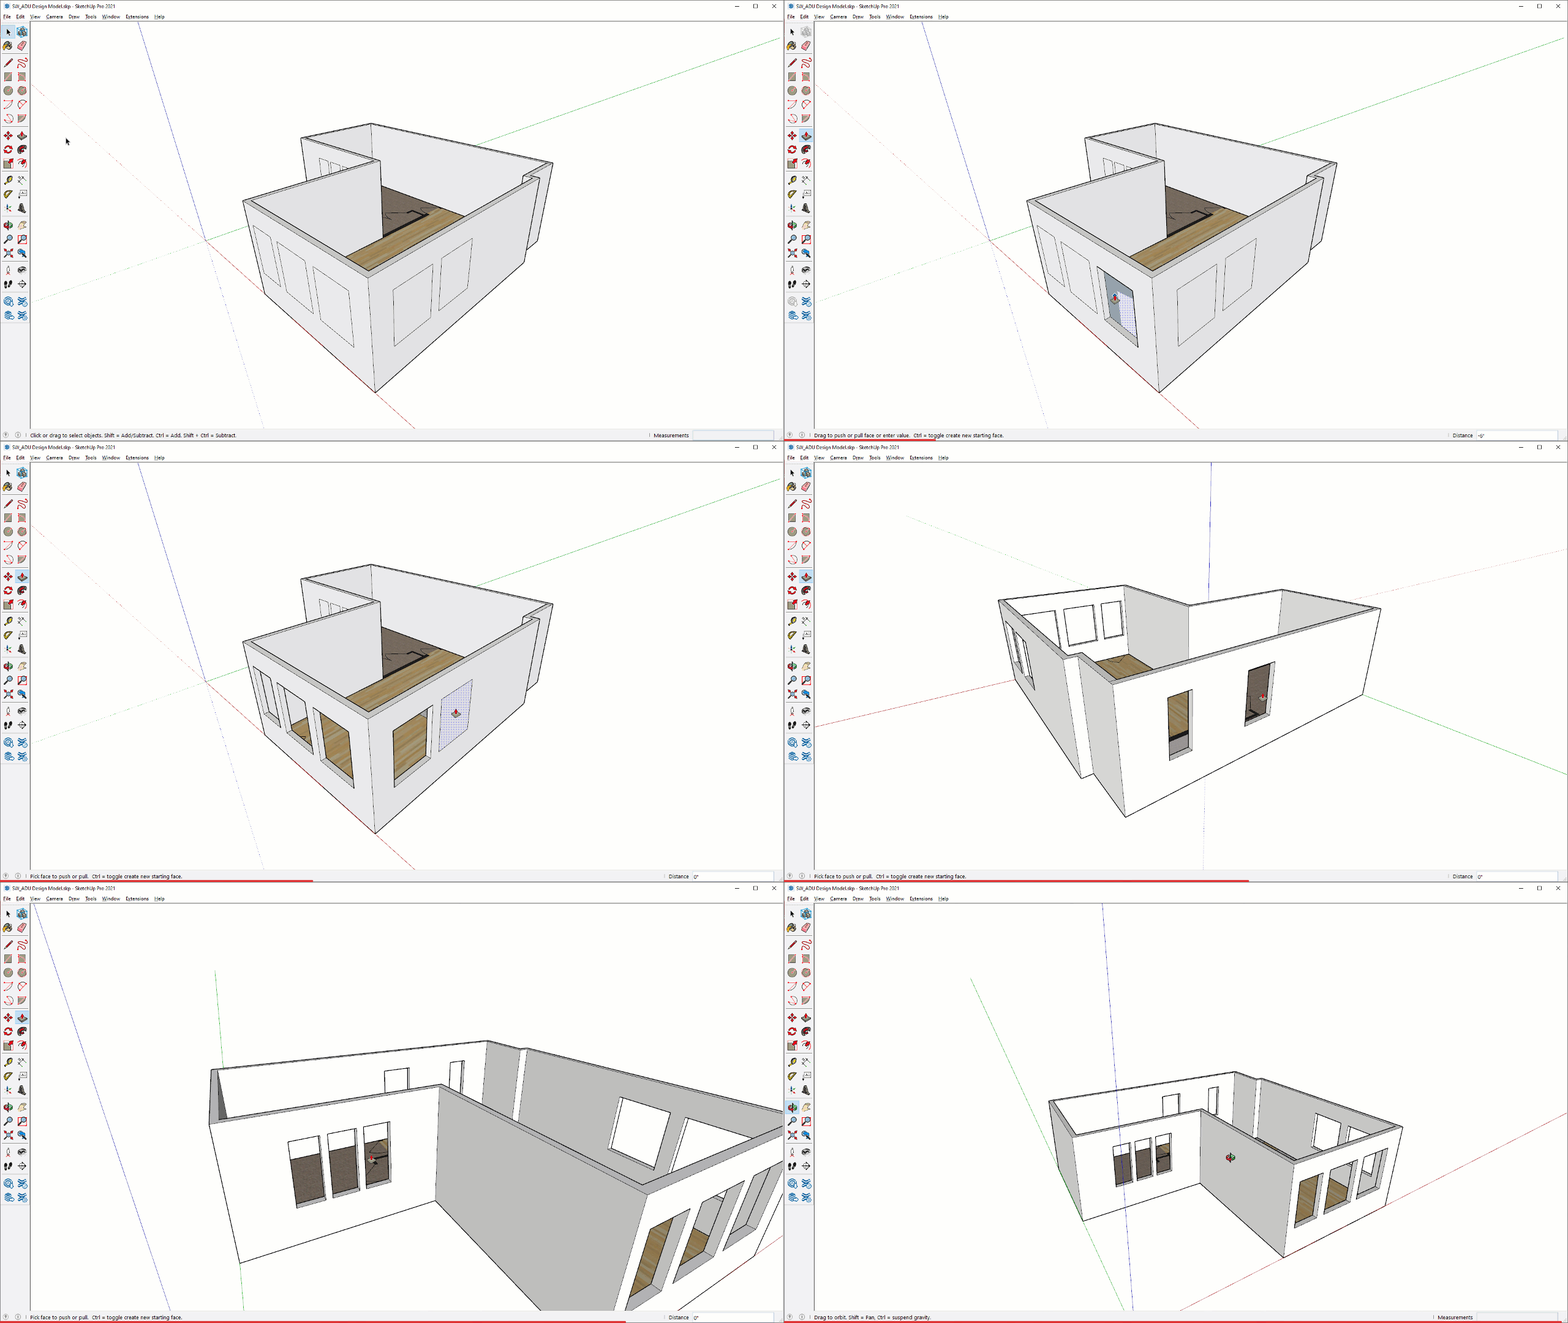
- Punch out the openings using the Push Pull Tool, a double-click will repeat the last distance and save you a ton of time.
Tags for Designers
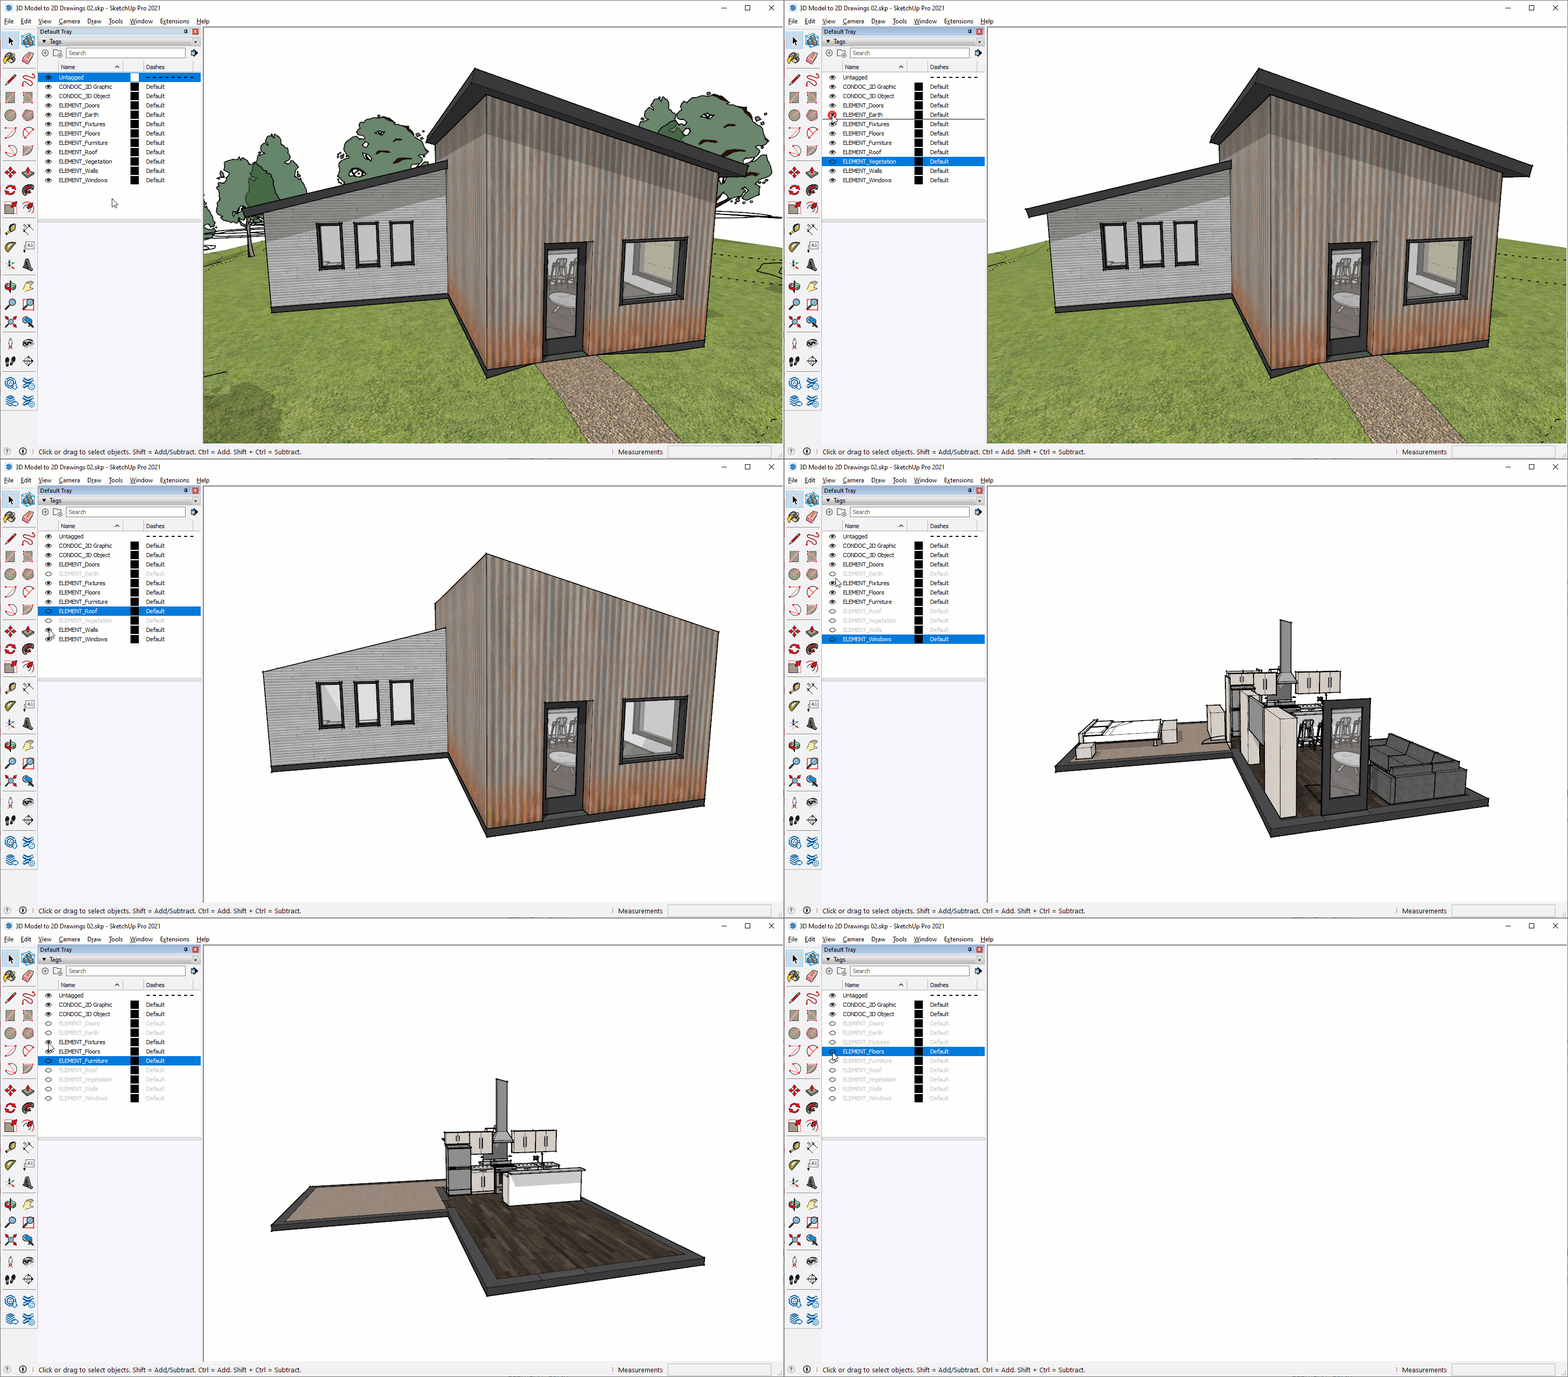
Up to now we have just been practicing with shapes, colors, and sizes to understand how nested groups and tags work. Let's now start to work with a small set of the "SketchUp Workflow" tags.
ELEMENT Tags
These are the minimum tags needed to describe a simple project like the ADU. Notice that these layers are prefixed with "ELEMENT_" to help sort them.
- ELEMENT_Walls
- ELEMENT_Roof
- ELEMENT_Floors
- ELEMENT_Earth
- ELEMENT_Vegetation
- ELEMENT_Windows
- ELEMENT_Doors
- ELEMENT_Decorative objects
- ELEMENT_Entourage
- ELEMENT_Fixtures
- ELEMENT_Furniture
- ELEMENT_Background
2D Graphic / 3D Object
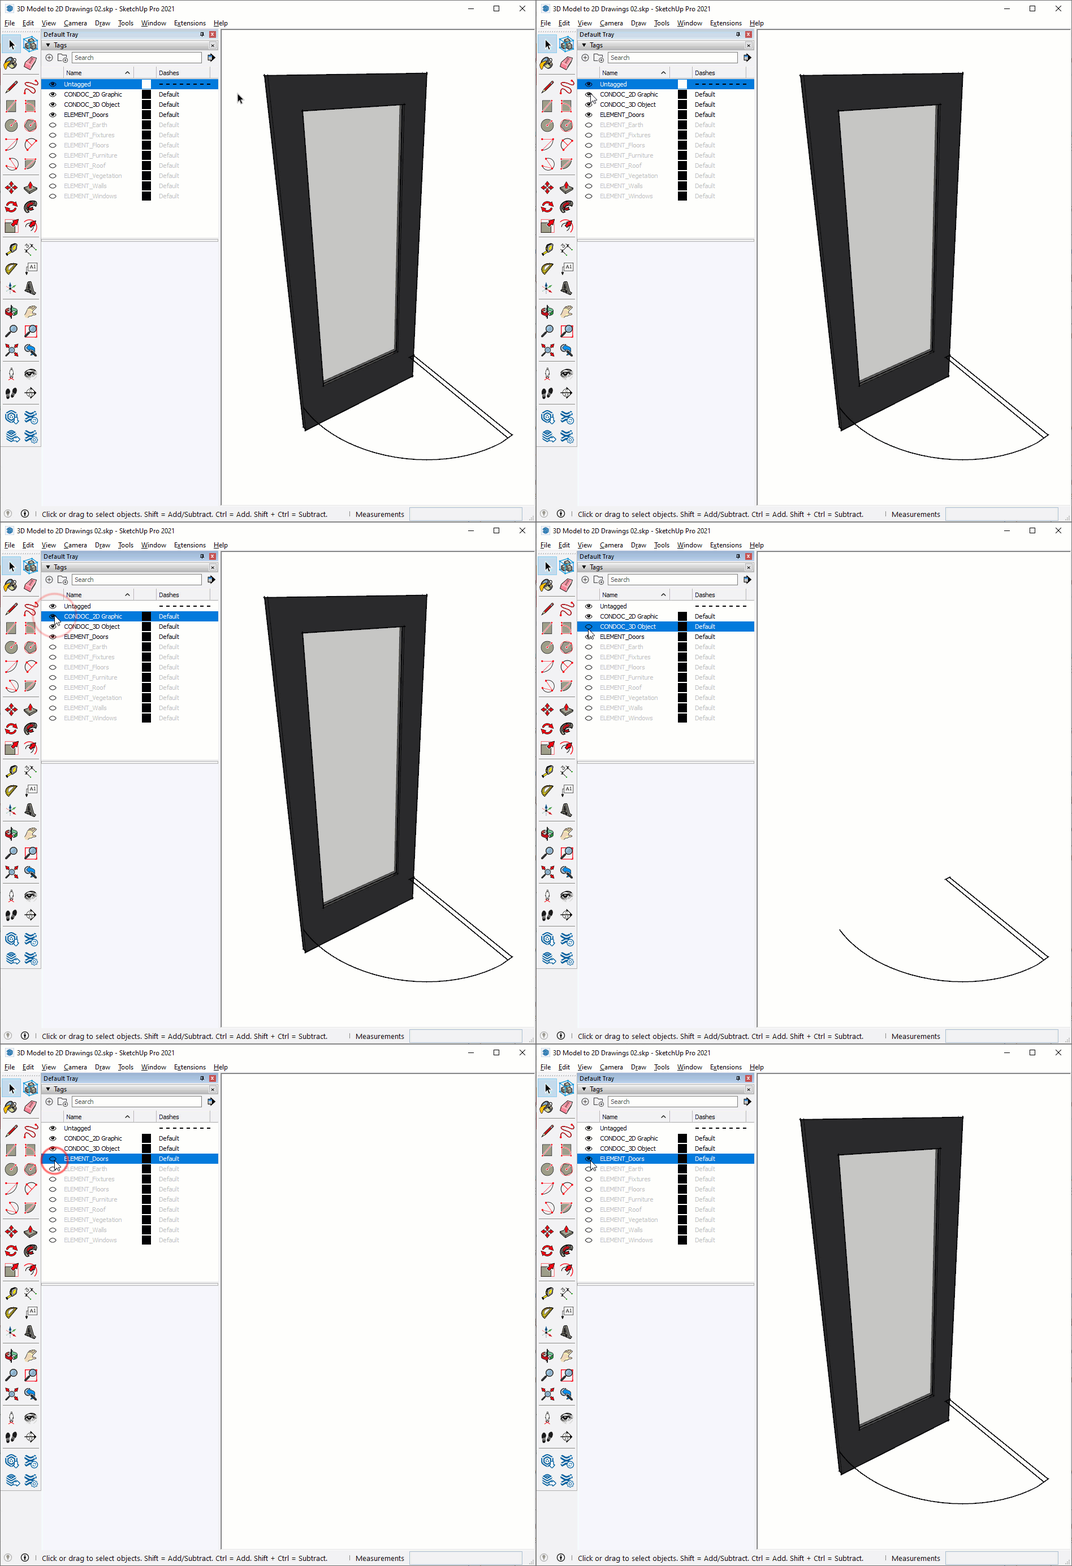
To properly create plans, we need one more dash of tag functionality. As you are creating plan scenes, you will find that some 3D objects don't render the correct 2d graphic when viewed from above. Doors are an apparent example. The industry graphic standard of a rectangle and an arc shown in plan has no relation to what a door actually looks like. In these instances, you will need to force the 2D graphic by drawing it, and assigning the ConDoc_2D Graphic tag. When a 2D graphic is present, it is best practice to assign the 3D Object tag to the 3D representation of the object. Keep these tips in mind when working with these layers...
- The 2D Graphic and 3D Object tags are the last in line of nested model organization.
- 3D objects show in section, elevation, and perspective drawings
- 2D graphics only show in plan
- If you create a 2D graphic for an object, you will also need a 3D object.
Heads Up! The ConDoc Door and Window are available for download from the 3D Warehouse. They already have this functionality baked in.
Visual Merge
Because of the way SketchUp works as a surface modeler, there will be times when you don't want to see an edge but you won't be able delete it because it is needed to complete a surface. This often happens when model organization groups meet.
One option is to hide the edge, but hiding is more of a modeling utility than a permanent fix. If you never want to see a specific entity, assign it to the CONDOC_Visual Merge layer.
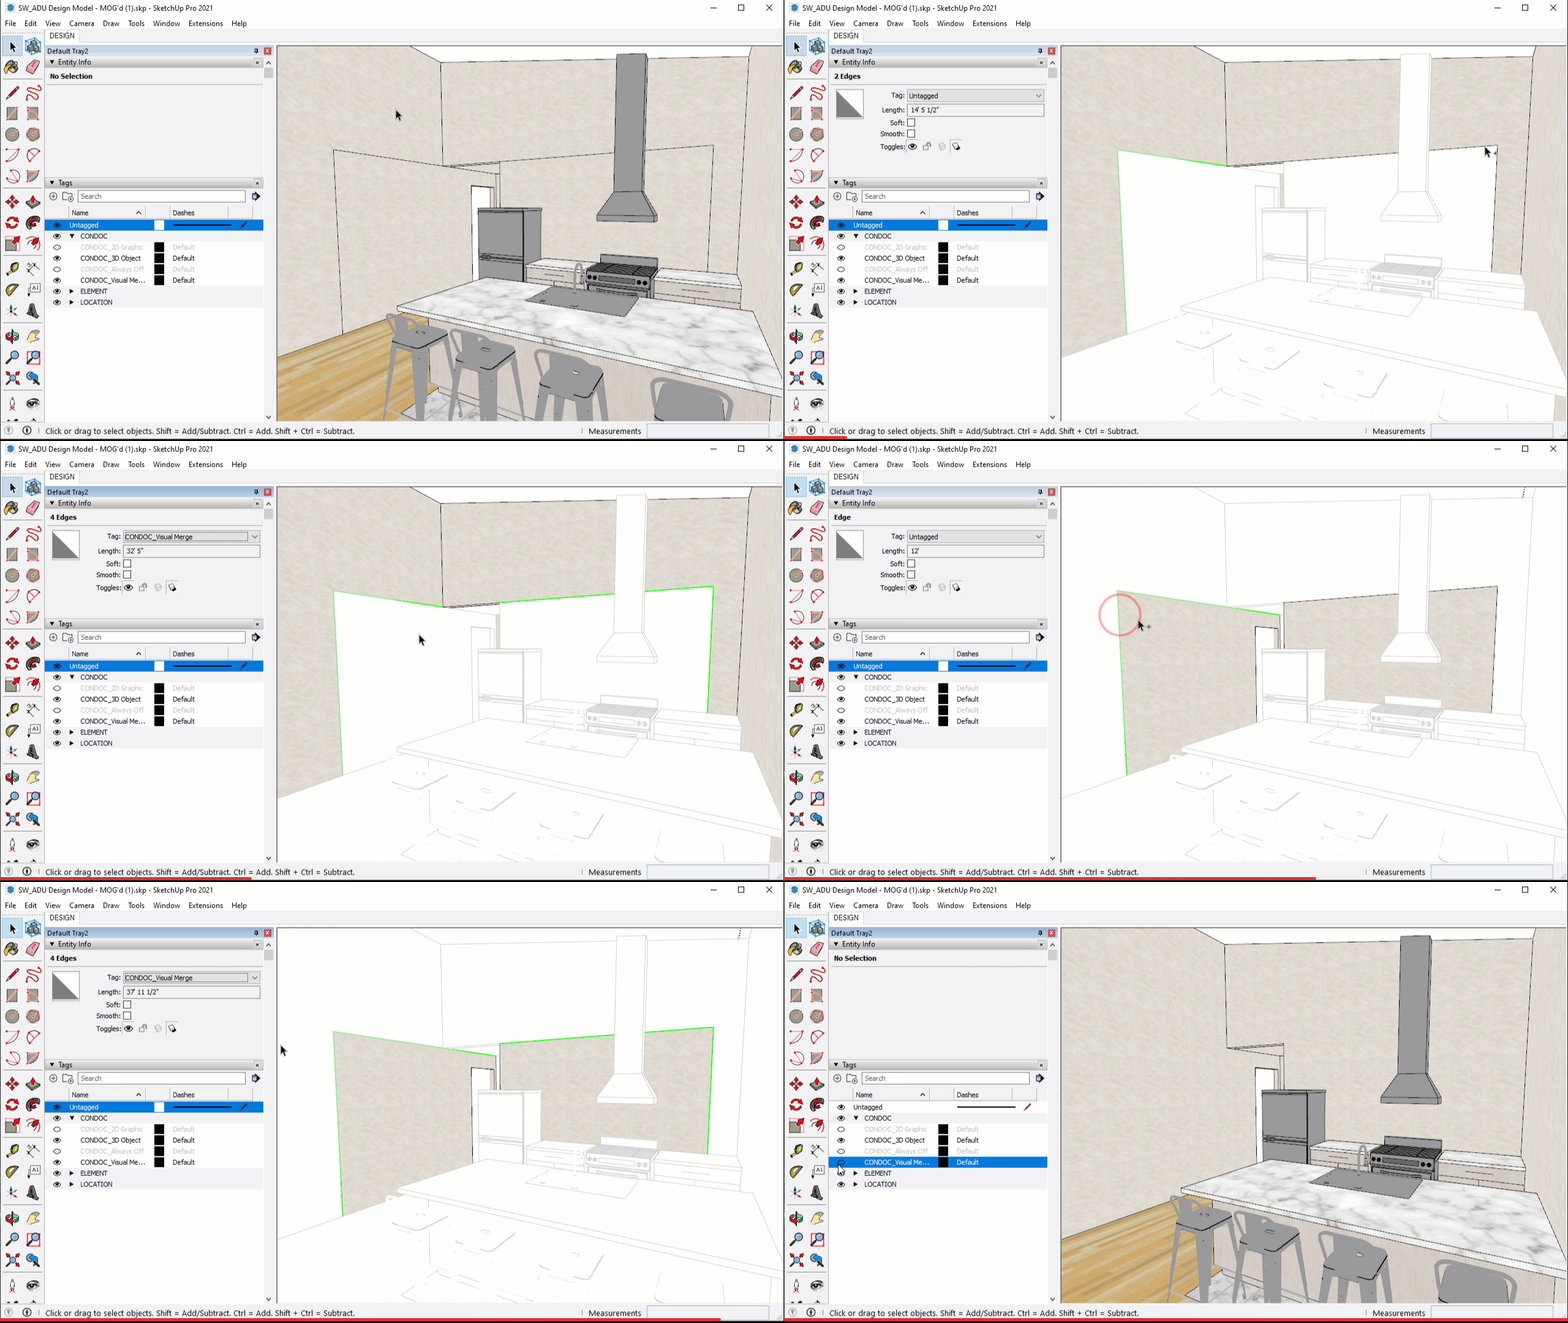
- Notice that where the wall containers meet, there are still lines. These lines need to remain in the model to make the surfaces, but they shouldn't be seen.
- Double-click all the way into the exterior wall's container, select the edges, and assign them to the CONDOC_Always Off layer. Th e edges are not gone yet because they also exist in the new wall's container.
- Double-click all the way into the interior wall's container, select the same edges, assign them to the CONDOC_Always Off layer.
- The wall appears seamless now, as it should for perspective renderings and elevations.
Select adjoining edges within wall groups and assign the Visual Merge tag...
HEADS UP! Remember the all-edges-and-surfaces-are-drawn-on-Layer0 rule? The CONDOC_Always Off layer is the one exception to that rule.
Are you doing okay?
We would love to hear how things are going so far! Please take a moment to fill out the survey below...
